WordPress Admin Dashboard: A Beginner's Guide (2026)

If you just installed WordPress, the admin dashboard is the screen where everything happens. Posts, pages, themes, plugins, users, settings: all of it lives behind one URL and one login.
This 2026 beginner guide walks you through the WordPress admin dashboard the way a real first-time user moves through it. By the end you will know how to log in, what every menu does, how to write your first post in the block editor, how to install a theme and a plugin safely, how to change the core settings, and what to do if you cannot get into wp-admin at all.
The copy, menu paths and procedures in this guide are written against the current WordPress UI (block editor and Site Editor for block themes).
What is the WordPress admin dashboard?
The WordPress admin dashboard, sometimes called wp-admin or the WordPress backend, is the control panel of your site. The public-facing site is what visitors see. The admin dashboard is what only logged-in users with permission can see.
From the dashboard you can:
- Write posts and pages, and publish them with the block editor.
- Upload and manage images, video and other files in the Media Library.
- Install, switch and customize themes, including block themes through the Site Editor.
- Install plugins to add features (forms, SEO, security, booking, analytics, and more).
- Create users with different roles (Administrator, Editor, Author, Contributor, Subscriber).
- Change core settings: site title, timezone, URL structure, comments, reading and writing behavior.
If you can use Gmail or a basic CMS interface, you can use wp-admin. The hard part is just knowing where each thing lives. That is what this guide covers.
How to access the WordPress admin dashboard
The default address for the WordPress admin login page is your domain followed by /wp-admin:
https://yourdomain.com/wp-admin/wp-login.php works too and redirects to the same login screen.
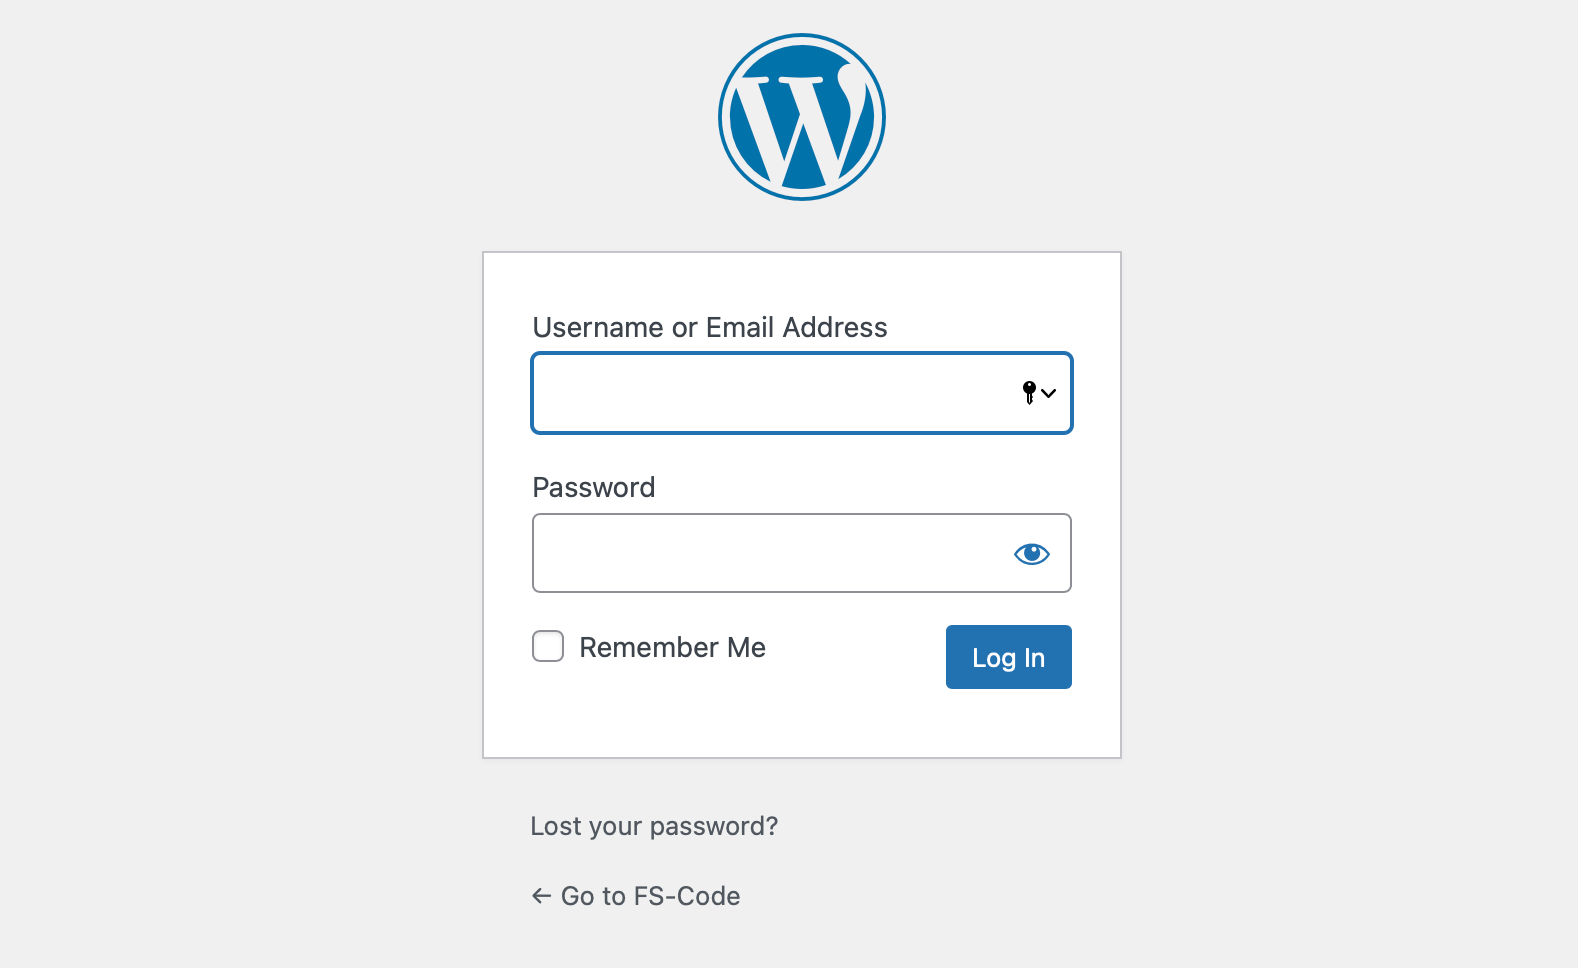
The WordPress login screen at /wp-admin.
To sign in, enter the username (or email) and password you set during WordPress installation, then click "Log In". If you check "Remember Me", the session stays signed in on that browser for two weeks.
A few notes worth knowing on day one:
- Forgot password: click "Lost your password?" on the login screen. WordPress will email a reset link to the email on file.
- Brute-force login attempts on
/wp-adminand/wp-login.phpare constant. For any site that is not a private test site, it is worth learning how to change your WordPress login URL and adding two-factor authentication via a plugin. - The login screen also includes a language switcher, so you can sign in to an English admin even if your site is in another locale.
If the login screen does not load at all, jump to the troubleshooting section below.
Tour of the WordPress admin dashboard
After you log in, you land on Dashboard → Home.
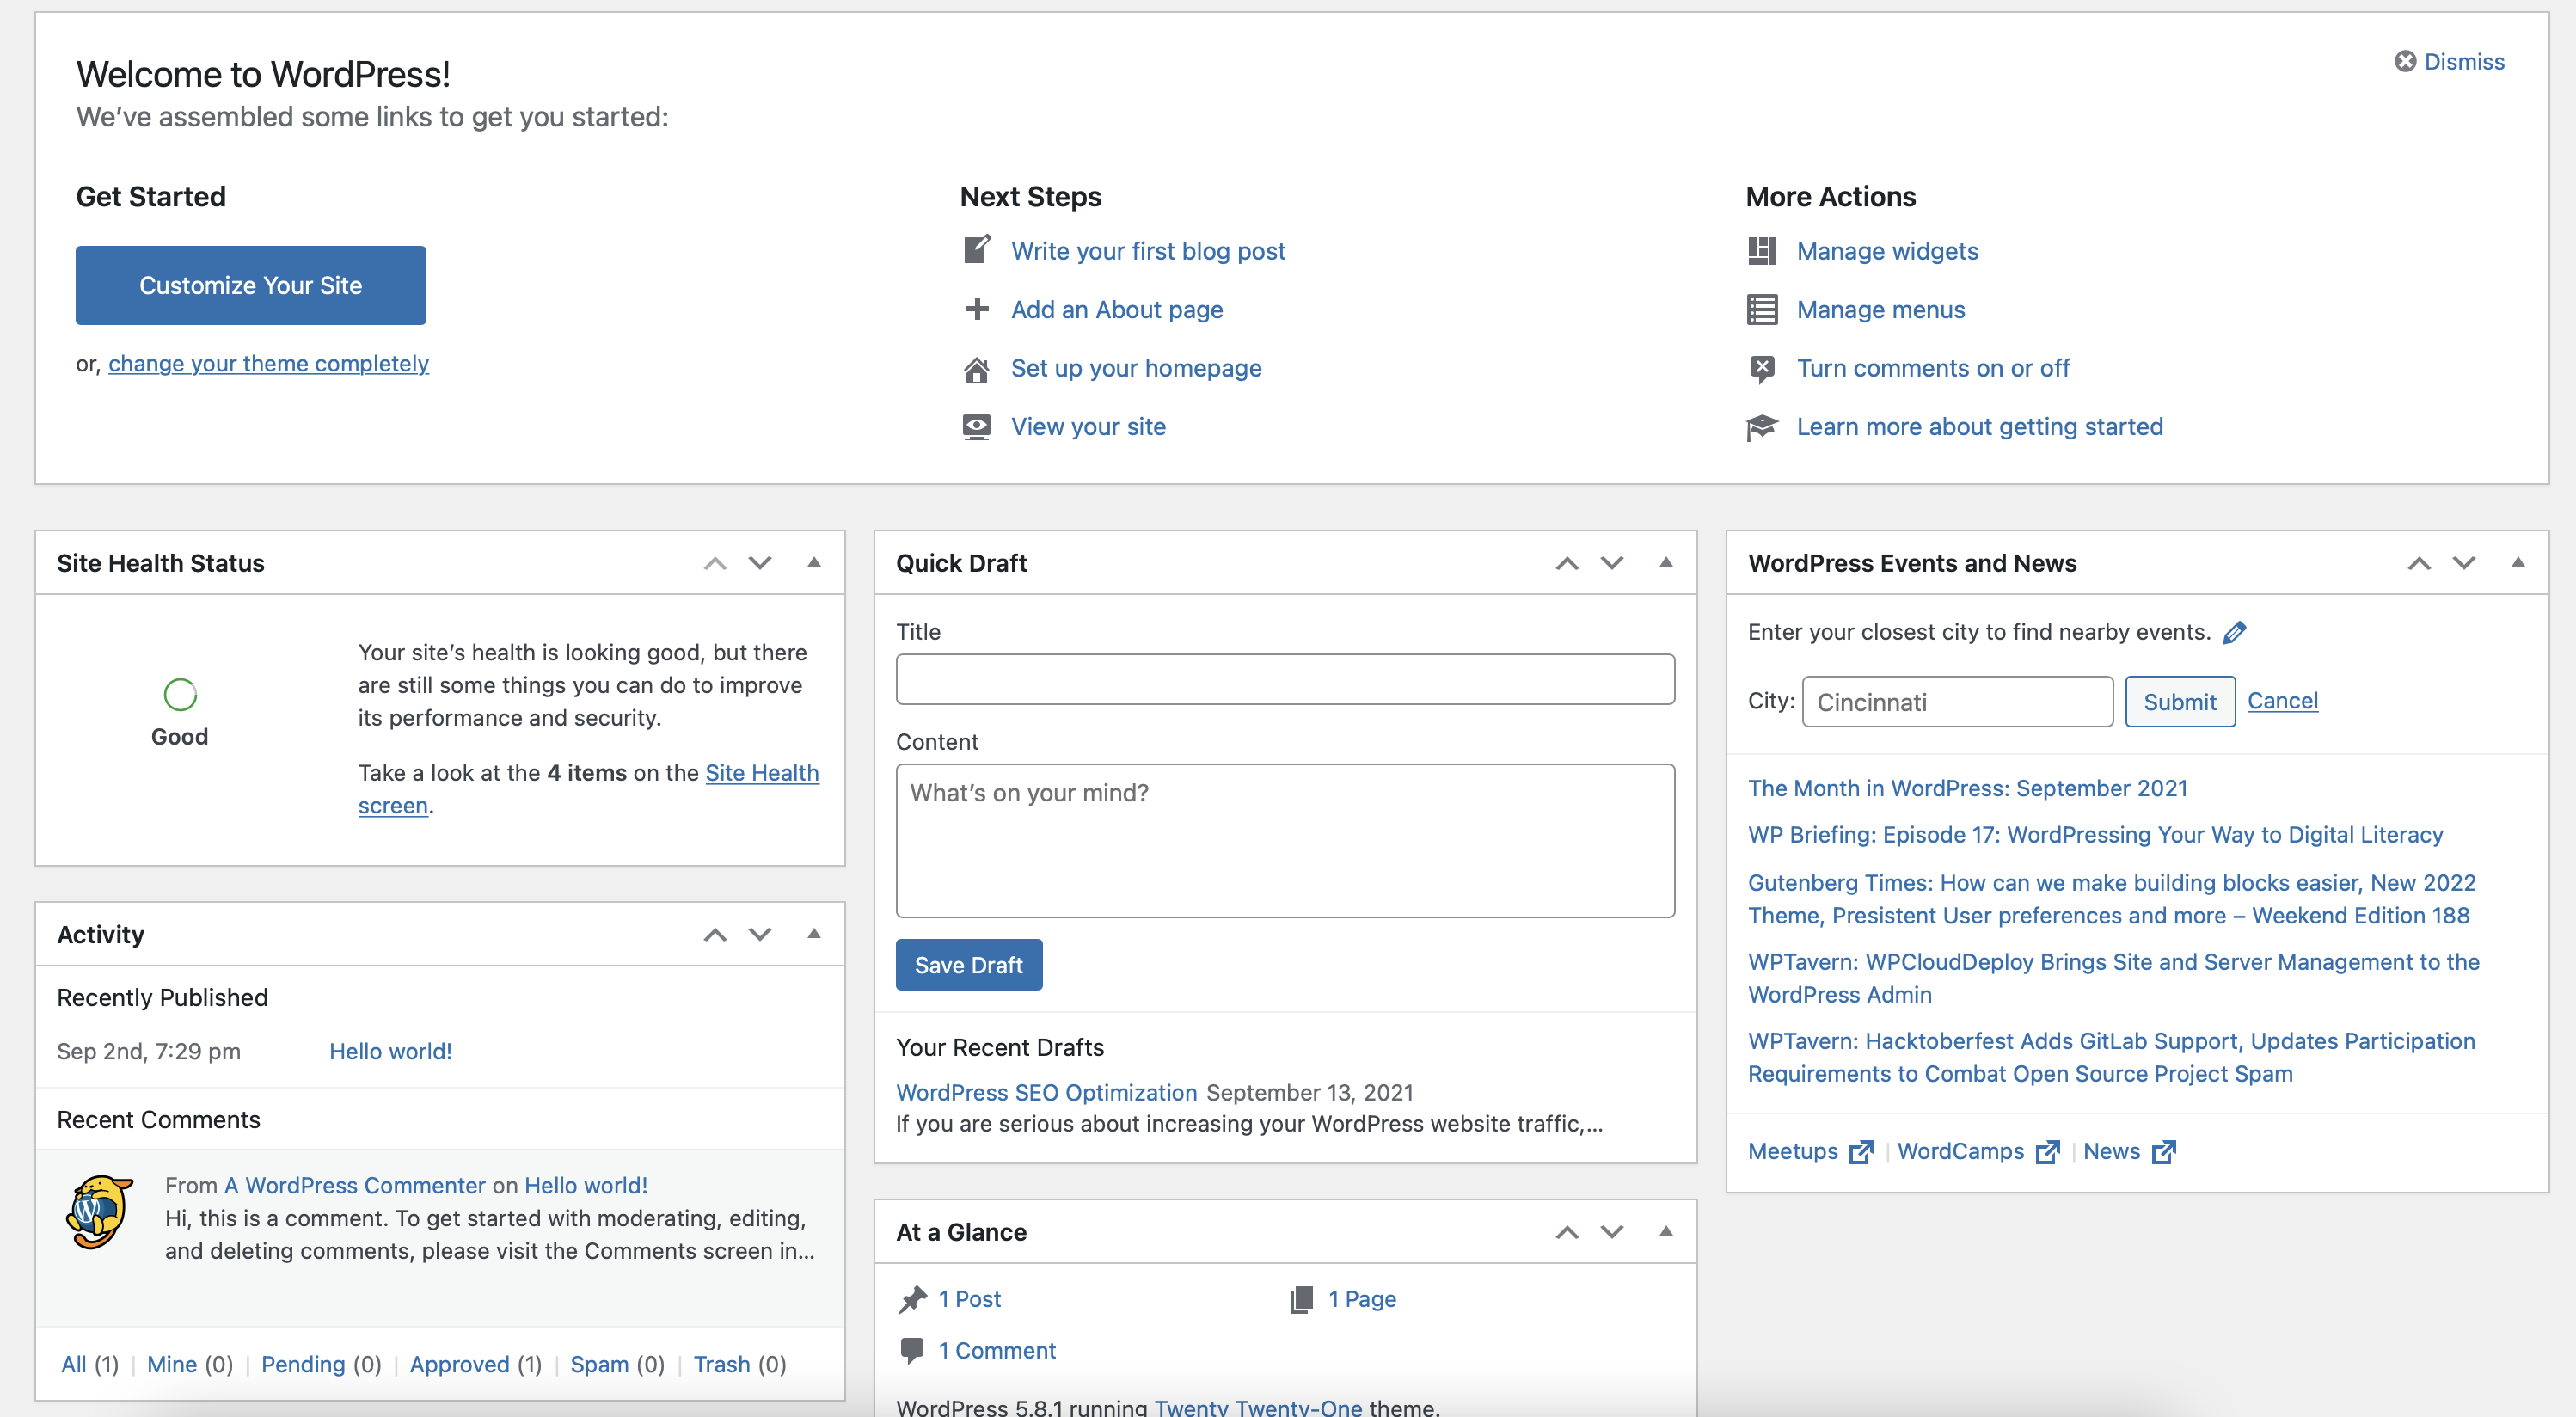
Dashboard → Home with the default widgets and the left admin menu.
The layout has three zones:
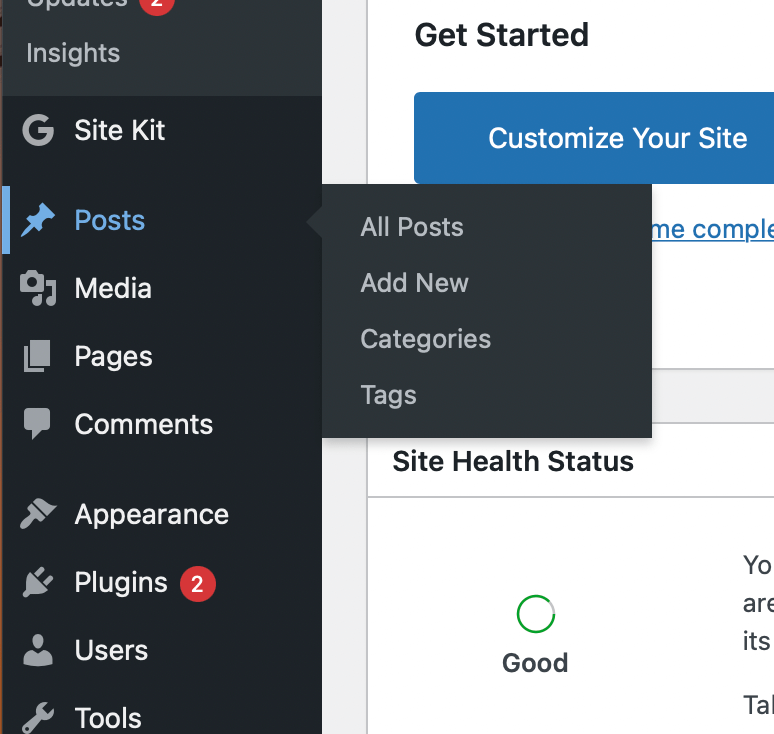
- Top admin bar (toolbar): a black bar across the top, visible only to logged-in users. It links to your site name (front-end), comments, "+ New" (quick create posts/pages/users), and your profile dropdown on the right.
- Left admin menu: the vertical column on the left with Dashboard, Posts, Media, Pages, Comments, Appearance, Plugins, Users, Tools, Settings, and any menu items added by your installed plugins. Hover any menu item to reveal its sub-items, or click to expand inline.
- Main work area: everything else is the working space for the current screen.
Dashboard Home widgets
The default Dashboard → Home shows a few widgets:
- At a Glance: a count of your posts, pages and comments, plus your current WordPress version and active theme.
- Activity: the most recent published posts and pending comments.
- Quick Draft: a small form to jot down a post idea without leaving the dashboard.
- WordPress Events and News: WordPress.org news and upcoming local WordPress meetups.
If you do not want one of these, click "Screen Options" in the top right of any admin screen, uncheck what you do not need, and the panel hides it.
Get used to the menu order
The left menu order rarely changes between sites, so the muscle memory transfers:
- Dashboard → home, updates, plugin diagnostics.
- Posts → blog posts, categories, tags.
- Media → all uploaded files.
- Pages → static pages (Home, About, Contact, Privacy Policy, etc.).
- Comments → comment moderation queue.
- Appearance → themes, customizer or Site Editor, menus, widgets.
- Plugins → installed plugins and the "Add New" plugin browser.
- Users → user accounts and roles.
- Tools → import, export, site health.
- Settings → site-wide settings.
Most plugins add their menu somewhere between Comments and Settings. The more plugins you install, the longer this menu becomes.
Writing your first post in the block editor
Go to Posts → Add New Post. WordPress opens the block editor (Gutenberg) by default.
The Posts area covers Add New Post, Categories and Tags.
The two things to know on day one:
- Title block: the big "Add title" line at the top. This becomes the post title and contributes to the page's title tag.
- Content blocks: below the title, every paragraph, heading, image, list, button or embed is a block. Click the "+" icon to insert one, or type
/inside a paragraph to search blocks by name (/image,/heading,/list).
The right sidebar has two tabs:
- Post (or Page): the per-post settings, including status (Draft, Pending, Published), visibility, scheduled publish date, URL slug, featured image, excerpt, categories, tags, discussion settings.
- Block: the settings for whichever block is currently selected.
To publish, click Publish in the top right. To save without publishing, click Save draft. To preview, click Preview → Preview in new tab.
Categories, tags and pages
Inside the Posts menu you also have:
- Posts → Categories: broad groupings for posts (e.g. "Tutorials", "News"). Every post should have at least one category. If you do not pick one, WordPress assigns the default category (usually "Uncategorized"), which you can rename under Settings → Writing.
- Posts → Tags: narrower topic labels for posts (e.g. "WordPress 6.x", "block editor"). Tags are optional.
Pages lives in its own menu item. Pages are for content that is not part of the blog timeline: Home, About, Contact, Privacy Policy, Pricing, Services. The editor is the same block editor as posts, just without category/tag fields.
For richer landing pages, beginner-friendly visual editing or templates, look at the best WordPress page builder plugins. For everything most sites need, the block editor is enough.
Media Library
Media → Library is where every image, video, audio, PDF and document you upload to WordPress lives.
Two views:
- Grid view: thumbnails. Best for browsing.
- List view: filename, author, attached post, date. Best for cleanup.
To add a file, click Add New Media File (or drag and drop into the Media Library page).
For each image you upload, fill in:
- Alt text: a short description of what the image shows. Used by screen readers and contributes to image SEO. Skip purely decorative alt text.
- Title, caption, description: optional, only fill in what you actually use on the front-end.
WordPress automatically generates multiple sizes of every uploaded image (thumbnail, medium, large, full). You set the dimensions for those sizes in Settings → Media.
Themes, the Customizer and the Site Editor
Appearance → Themes shows every theme installed on the site. The active theme has a "Active" badge. To install a new one, click Add New Theme, browse the WordPress.org theme directory inline, click Install and then Activate.
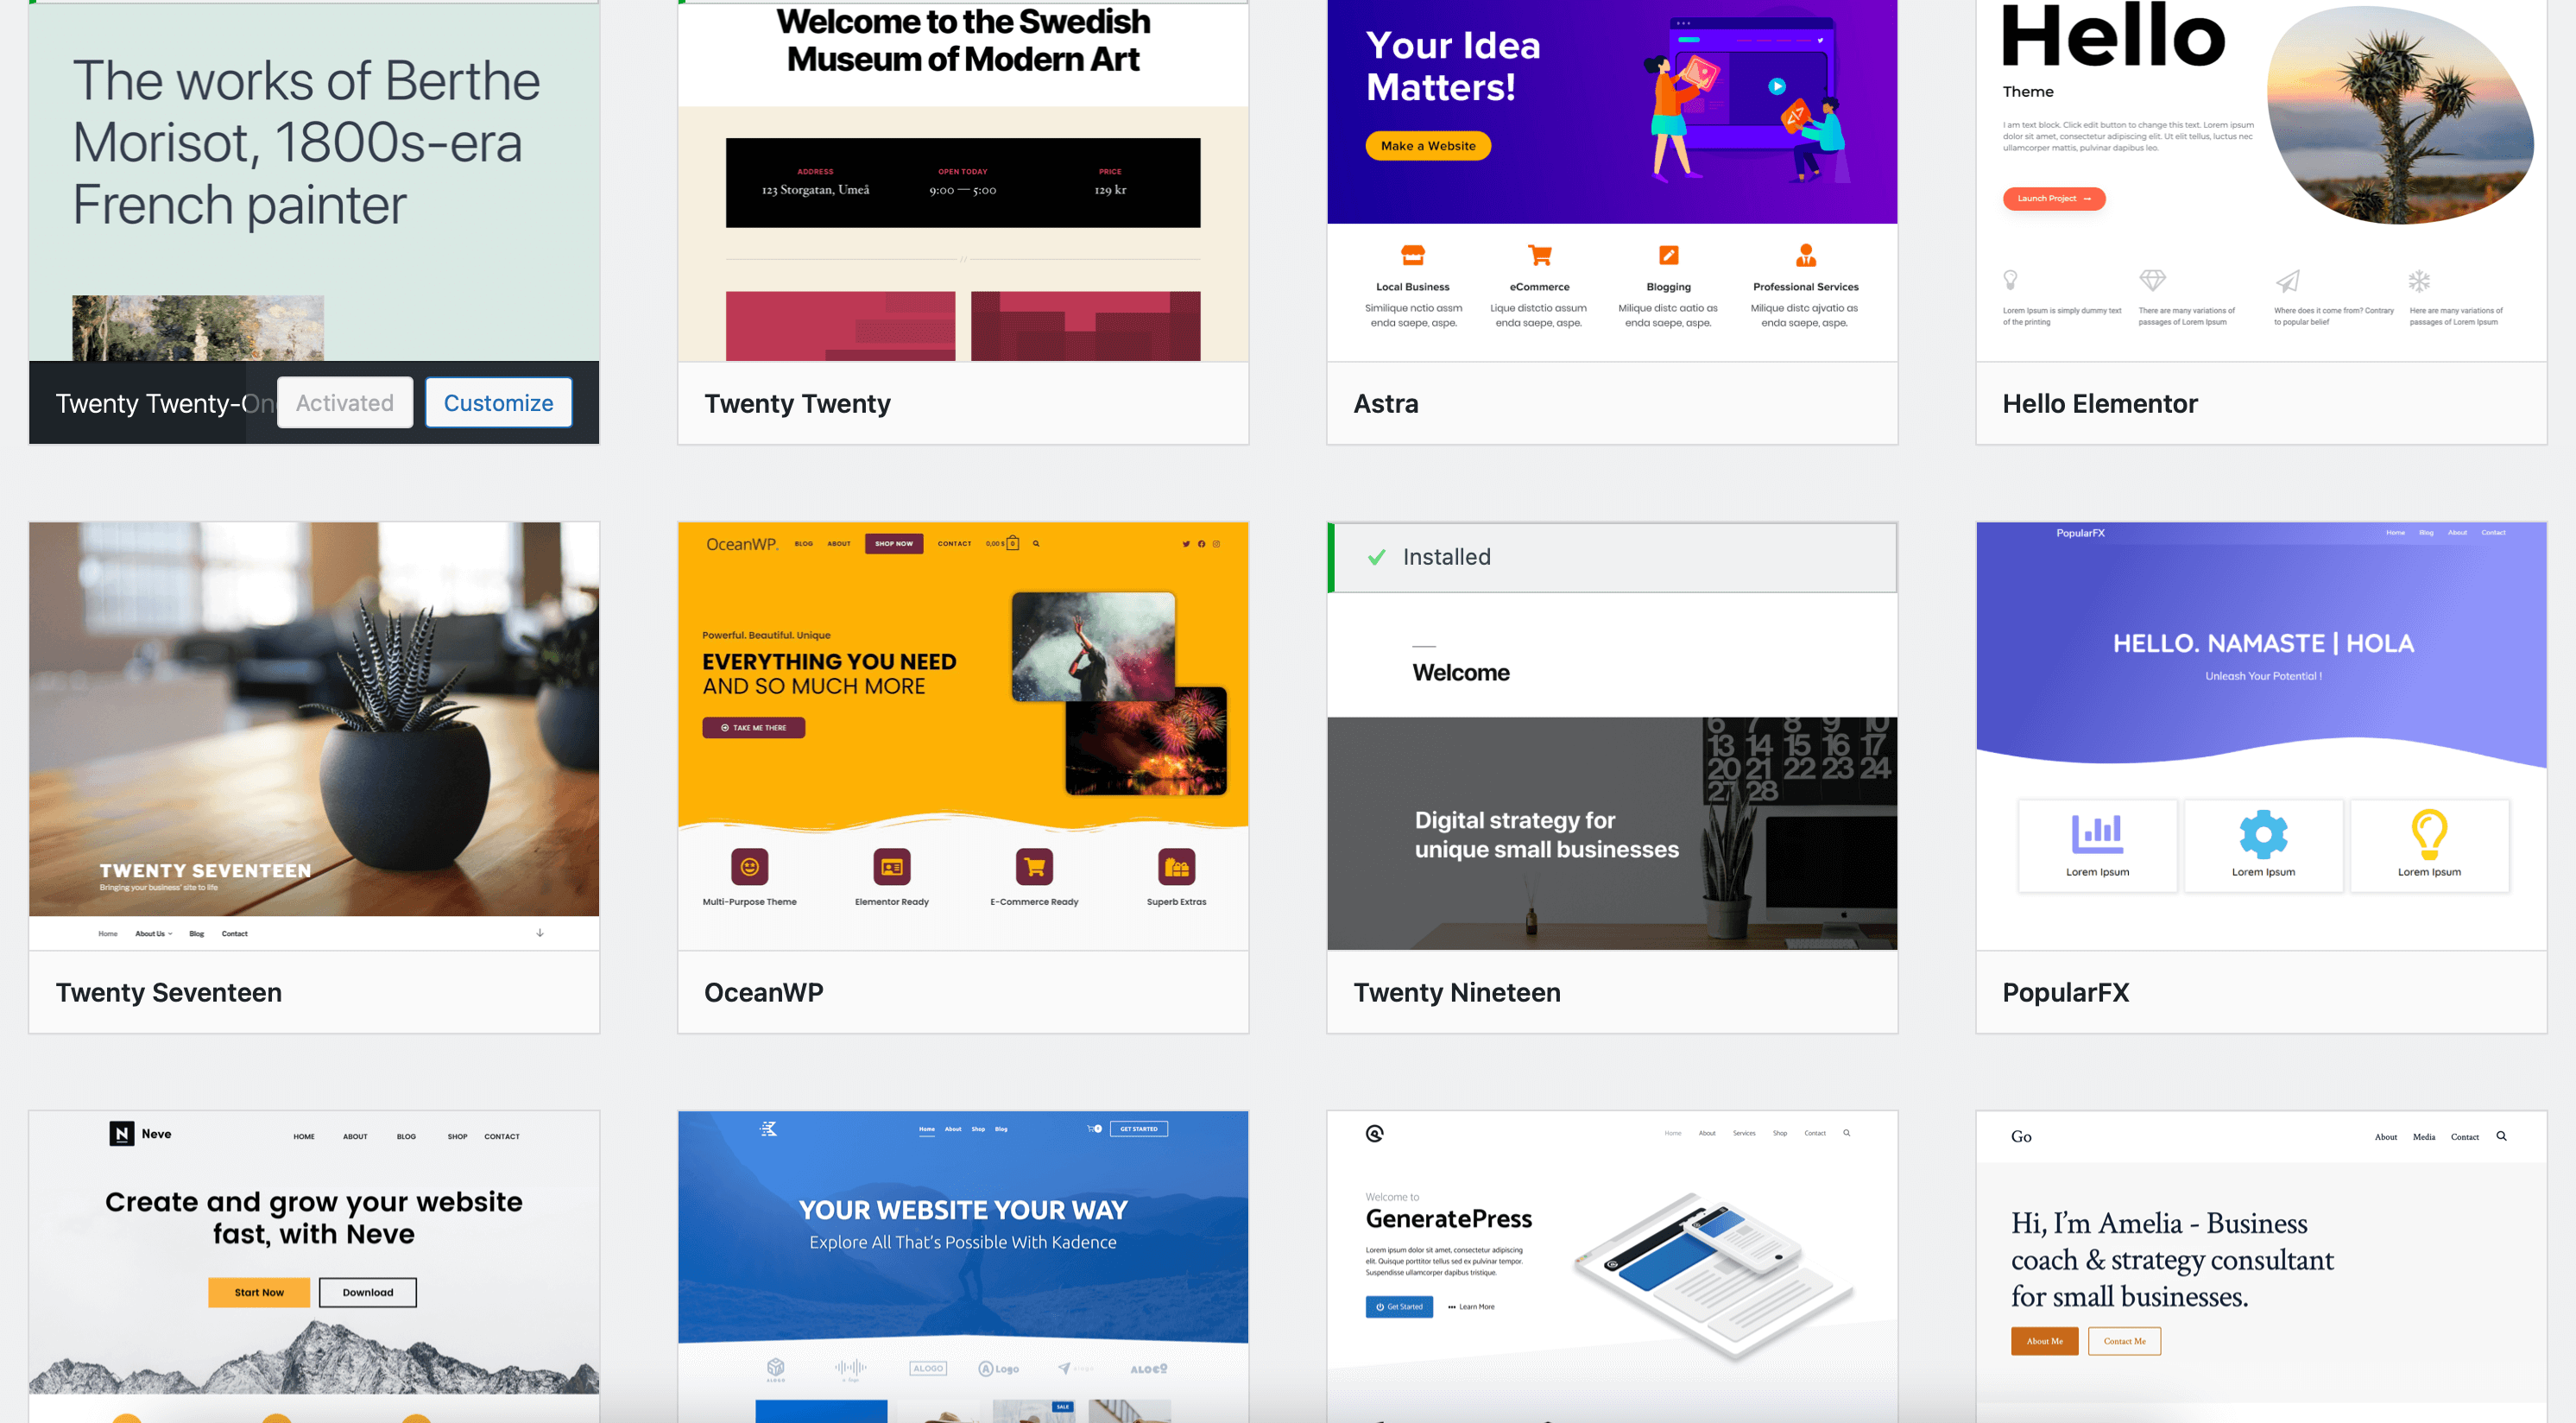
Appearance → Themes lists every installed theme and exposes the Add New Theme browser.
How you customize the look depends on whether your active theme is a "block theme" or a "classic theme":
- Block themes (default for new WordPress sites since the introduction of full site editing): customization happens in Appearance → Editor, also called the Site Editor. From there you can edit templates (single post, archive, 404), template parts (header, footer), and global styles (colors, typography, layout) using blocks.
- Classic themes: customization happens in Appearance → Customize (the WordPress Customizer), with live preview panels for site identity, colors, header, menus and widgets.
You will also see, depending on the active theme:
- Appearance → Menus: for classic-theme navigation menus.
- Appearance → Widgets: for classic-theme sidebar and footer widgets.
- Appearance → Header / Background: legacy options some classic themes still expose.
If your Appearance menu only shows "Themes" and "Editor", you are on a block theme. If it shows "Customize", "Menus" and "Widgets" too, you are on a classic theme.
A short safety rule for beginners: do not edit theme files directly under Appearance → Theme File Editor unless you know what you are doing, and you have a backup. One typo there can take the entire site down.
Plugins
Plugins → Installed Plugins lists every plugin on the site, with Activate, Deactivate, Update, and Delete actions per row.
Plugins → Add New Plugin opens the WordPress.org plugin directory inline. You can search by keyword (e.g. "SEO", "contact form", "backup"), install with one click, and activate.
A few beginner-safe rules:
- Only install plugins from the official WordPress.org directory or directly from the developer's site. Never install nulled WordPress plugins downloaded from random "free download" sites. They commonly ship with malware.
- Install only what you actually use. Every plugin is more code to maintain, more attack surface, and more performance overhead.
- Update plugins regularly. Outdated plugins are the most common cause of WordPress hacks.
- Before installing on a live site, check: last update date, active install count, current WordPress version compatibility, and recent reviews.
For SEO specifically, comparing the most-used options helps. See our top free SEO plugins for WordPress overview before you install anything.
Users and roles
Users → All Users lists every account on the site. Users → Add New User creates a new one.
The five default WordPress roles, from most to least power:
- Administrator: full control of the site. Can install plugins/themes, edit code, manage users.
- Editor: can publish and manage all posts and pages, including those by other users.
- Author: can publish and manage only their own posts.
- Contributor: can write and edit their own posts but cannot publish them.
- Subscriber: can only manage their own profile. Used for membership and comment-restricted sites.
Give every user the lowest role they need to do their job. Resist the urge to make everyone an Administrator.
Users → Profile is where you change:
- Your display name and bio.
- Your password (now using strong-password recommendations and a "Generate Password" button).
- Your admin color scheme (eight built-in palettes).
- Whether the top toolbar is visible while viewing the site (default on).
- Keyboard shortcuts for comment moderation.
Configure WordPress core settings
Settings is where the global behavior of WordPress lives. The first time you set up a site, walk through these in order.

Settings → General is the first stop for a new site.
Settings → General
- Site Title and Tagline: what shows in the browser tab, search results and most themes' header.
- WordPress Address (URL) and Site Address (URL): usually identical. Only change these if you know what you are doing (wrong values lock you out of wp-admin).
- Administration Email Address: where WordPress sends admin notifications.
- Membership: "Anyone can register" is off by default. Leave it off unless you are running a membership site.
- Site Language, Timezone, Date Format, Time Format, Week Starts On: set these once, so post timestamps look right.
Settings → Writing
- Default Post Category and Default Post Format: what new posts use when you do not pick.
- Post via email: legacy feature, leave alone unless you have a specific need.
Settings → Reading
- Your homepage displays: "Your latest posts" (a blog) or "A static page" (a website with a Home and a separate Posts page). For most business sites, set this to a static page and pick your Home and Posts pages.
- Blog pages show at most: how many posts per archive page.
- Search Engine Visibility: the "Discourage search engines" checkbox. Make sure this is unchecked on a live site, otherwise WordPress adds
noindexsite-wide and search engines drop you from results.
Settings → Discussion
- Default post settings: whether to allow trackbacks, pingbacks and comments by default on new posts.
- Other comment settings: require name/email, require account, close comments on old posts.
- Avatars and comment moderation: Gravatar settings and the comment moderation queue rules.
Settings → Media
The default image sizes WordPress generates for every uploaded image. Defaults are fine for most sites.
Settings → Permalinks
The URL structure for posts. The default for new sites is Post name, which produces yourdomain.com/sample-post/. Keep that unless you have a reason to change it. Changing permalink structure on an established site without setting up redirects breaks every existing link to your content.
Settings → Privacy
Lets you pick which page is your Privacy Policy. WordPress also offers a starter privacy policy template you can edit.
Customize the admin dashboard look
The admin dashboard's own appearance can be tweaked, on top of the site itself:
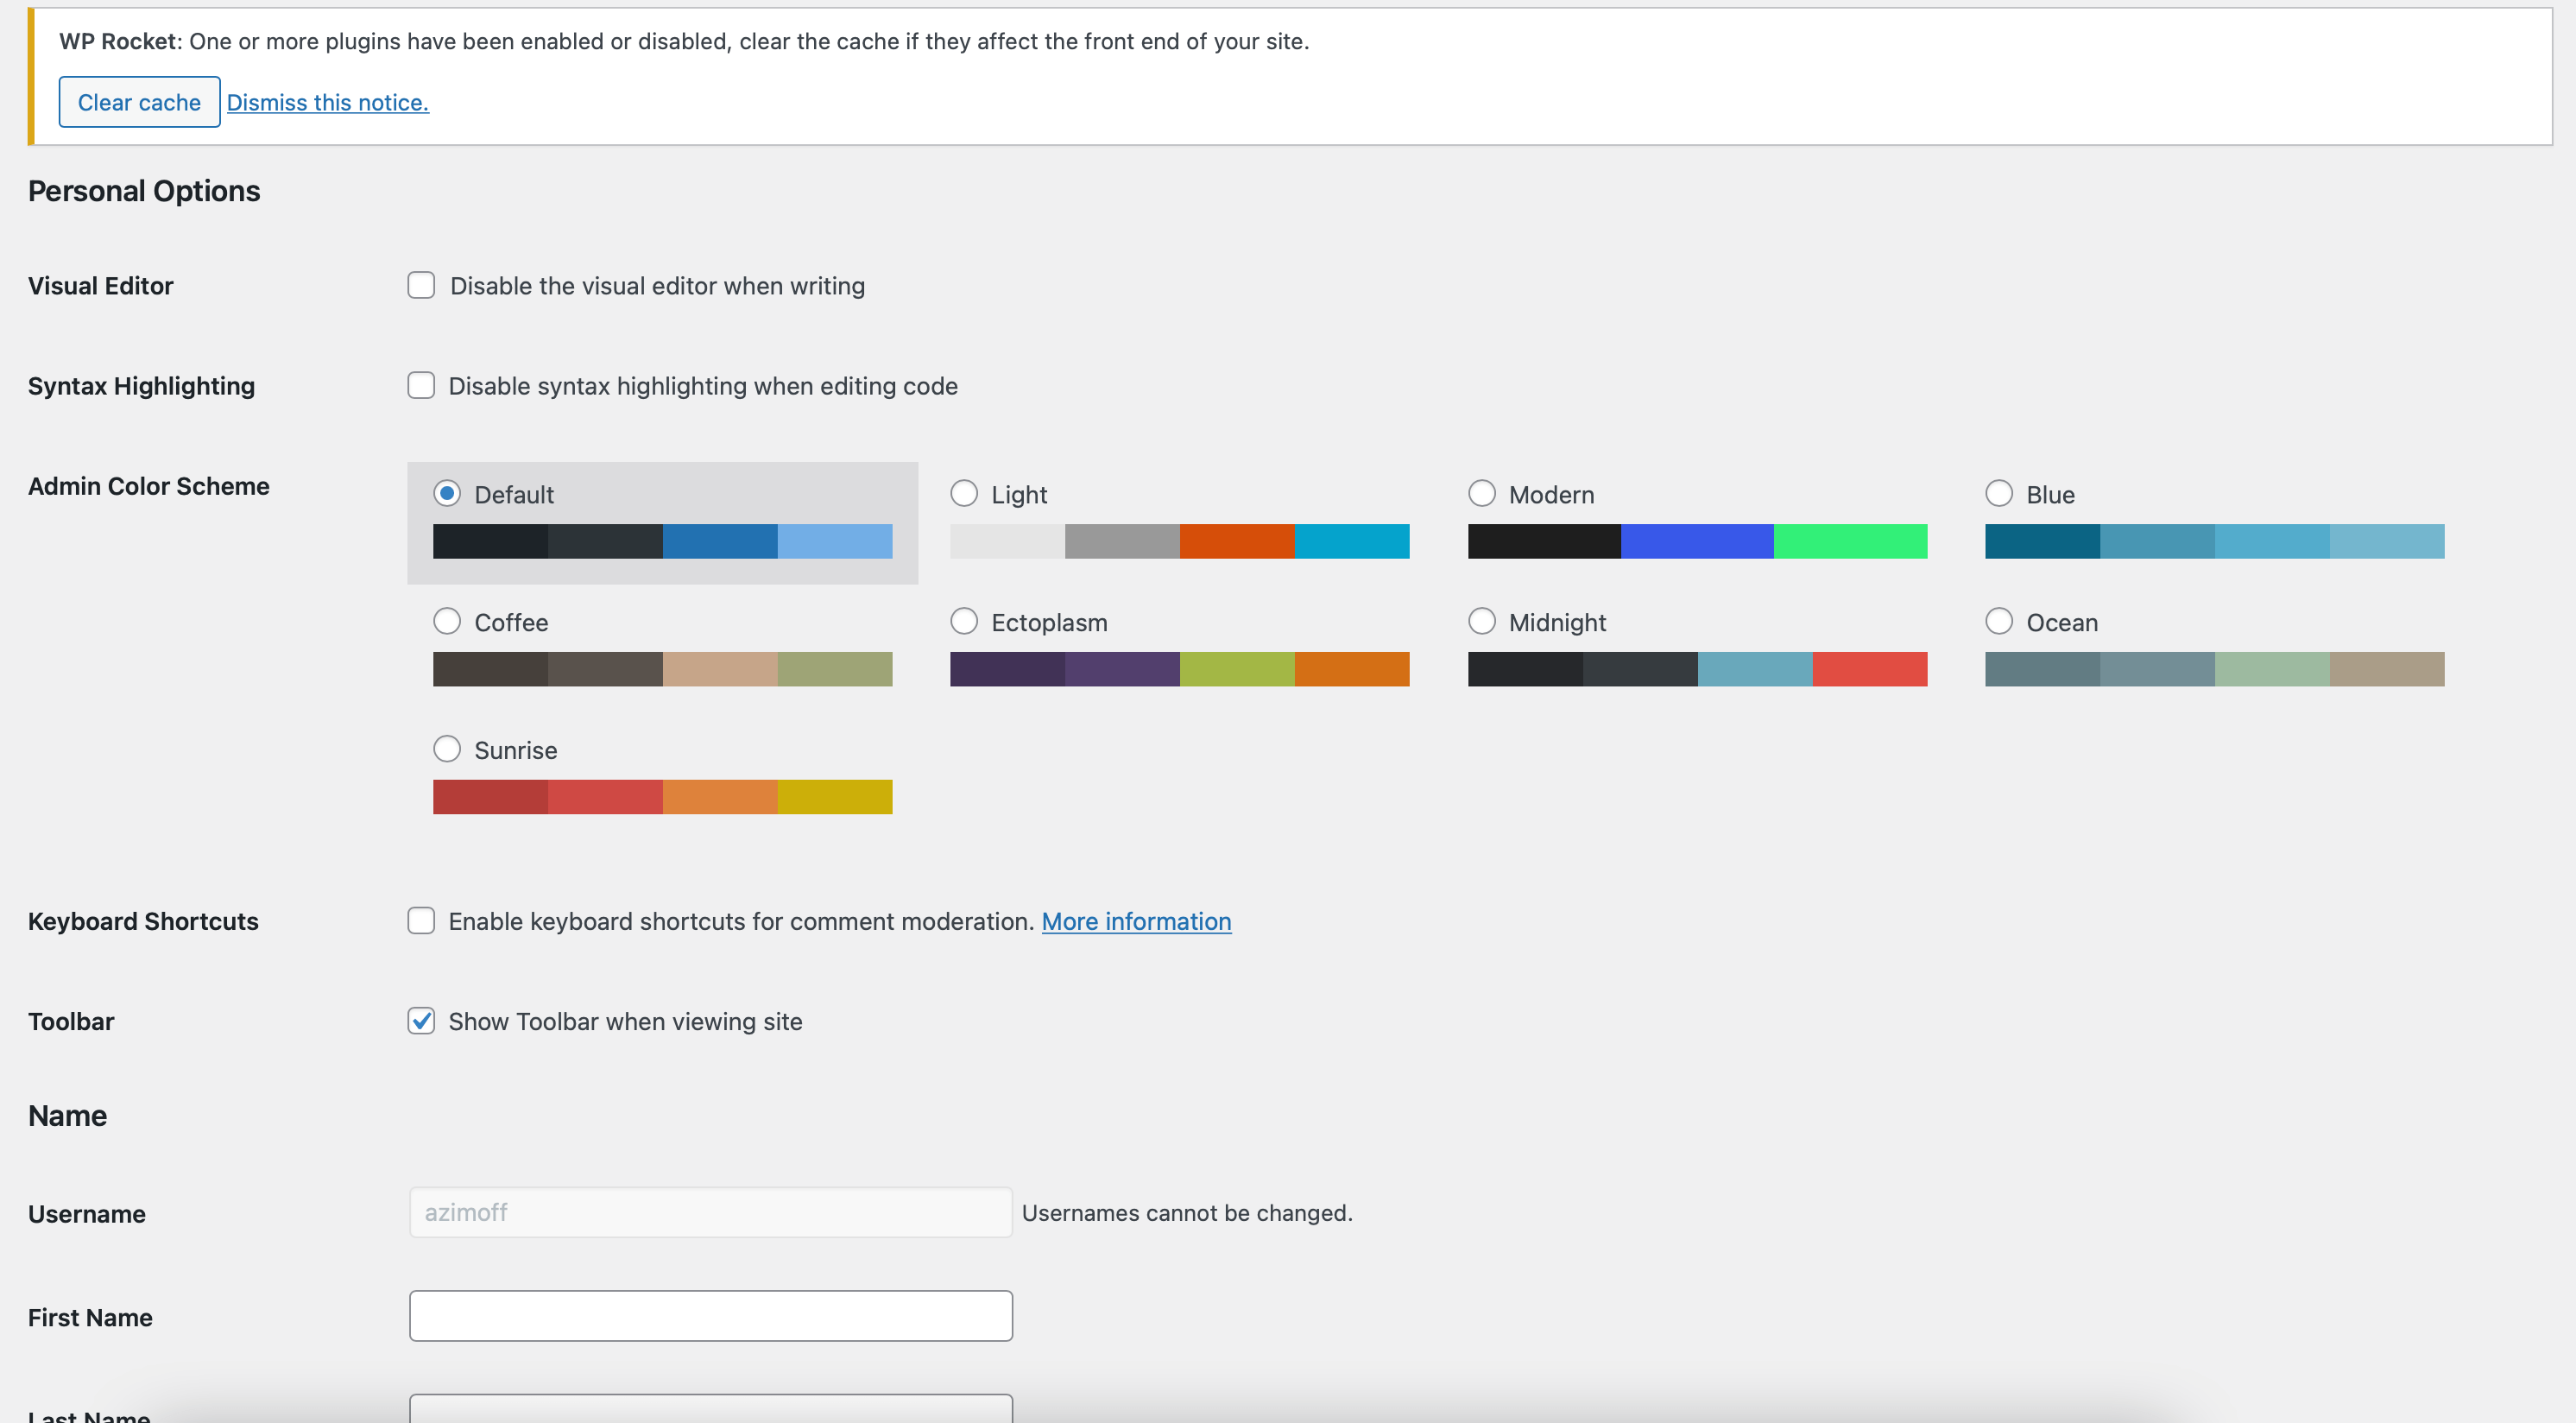
Users → Profile lets each account pick its own Admin Color Scheme.
- Users → Profile → Admin Color Scheme: pick from the built-in palettes (Default, Light, Modern, Blue, Coffee, Ectoplasm, Midnight, Ocean, Sunrise). Affects only your account, not other users.
- Toolbar: uncheck "Show Toolbar when viewing site" in Users → Profile to hide the top admin bar on the front-end while you are logged in.
- Screen Options: appears on most admin screens (top right) and lets you toggle which columns and panels are visible per screen.
- Help tab: also top right, surfaces context-specific docs for the current screen.
If you want deeper white-label or branding control (replacing the WordPress logo on the login screen, hiding menus for specific roles), that is plugin territory. Only install one of those if you actually need it.
Can't access wp-admin? Quick fixes
If /wp-admin does not load or you cannot log in, work down this list:
- Wrong password: click "Lost your password?" on the login screen. Check spam folder for the reset email.
- Account does not exist: if you do not get a reset email, the username or email may not actually exist on the site. Ask the site admin or, if you have hosting access, reset the password directly from the database (
wp_userstable) or via WP-CLI. - "Error establishing a database connection": the site cannot reach its database. Usually a
wp-config.phpissue, a hosting outage, or a corrupted database. Contact your host. - "There has been a critical error on this website": WordPress hit a fatal PHP error, often after a plugin or theme update. Check the email WordPress sends to the admin email, which often includes a one-click WordPress Recovery Mode link, then follow the guide to solving WordPress critical errors to identify the cause.
- White screen, redirect loop, or "Sorry, you are not allowed to access this page": usually a plugin conflict or a corrupted
.htaccess. Renaming the active plugin folder via FTP/file manager forces all plugins off so you can log back in. - Locked out by a security plugin or 2FA loss: the site's security plugin may have IP-blocked you, or you lost access to your authenticator. You will need file-system or database access to disable the plugin temporarily.
- Custom login URL: if you previously changed
/wp-adminto a custom path with a "hide login" plugin, only that custom path works now. Use the URL you set.
For anything deeper than this, having an off-site backup is the difference between a 10-minute fix and a multi-day rebuild. Set up backups before you need them.
Test changes safely before going live
A simple rule that saves beginners a lot of pain: do not test theme updates, plugin updates or major content changes directly on the live site if you can avoid it.
Two beginner-friendly ways to test safely:
- Local install: run WordPress on your own laptop. Any local WordPress environment will do. Useful for trying themes, plugins and editor changes without any production risk.
- Staging site: most managed WordPress hosts offer one-click staging. Push your live site to staging, make changes there, then push back to production once you are happy.
This separation also pairs nicely with the official WordPress.org documentation, which is the canonical place to read how a given feature behaves before you touch the live site.
FAQ
What is the WordPress admin dashboard?
It is the back-end control panel for a WordPress site, reached at yourdomain.com/wp-admin. From there you write posts and pages, manage media, install themes and plugins, manage users, and configure the site's settings. Only logged-in users with permission can see it.
How do I access the WordPress admin dashboard?
Go to yourdomain.com/wp-admin in your browser and sign in with the admin username (or email) and password you created during WordPress installation. If you forgot the password, click "Lost your password?" to email yourself a reset link.
How do I log into the WordPress admin dashboard if I forgot my password?
Open the login screen and click "Lost your password?". WordPress emails a reset link to the email address on file. If you do not receive it, check spam, confirm your hosting is not blocking outgoing mail, or reset the password through your host's database tool or WP-CLI.
How do I customize the WordPress admin dashboard?
For per-user changes, go to Users → Profile and pick an Admin Color Scheme, toggle the top toolbar, or use Screen Options on each screen to hide widgets and columns you do not use. For site-wide changes (custom logo on the login screen, role-based menu hiding, branded admin), use an admin customization plugin.
Can't access the WordPress admin dashboard, what should I do?
Try a password reset first. If the login URL itself errors out, check for a critical error message (use WordPress Recovery Mode), rule out plugin conflicts by renaming the plugins folder via file manager, and confirm with your host that the database is reachable. The "Can't access wp-admin?" section above lists the most common causes and fixes.
Wrapping up
The WordPress admin dashboard looks intimidating the first time you open it, then it stops looking intimidating about three sessions in. Spend an hour walking through every menu (Dashboard, Posts, Media, Pages, Appearance, Plugins, Users, Tools, Settings) on a test site, click into each sub-item, read what is there, and the next time you need to do something specific, you will already know where it lives.
Bookmark this guide, keep /wp-admin open in a tab while you learn, and refer back to the troubleshooting section the first time something breaks.