This website uses cookies to ensure you get the best experience on our website.Learn more
How to Set Up a WooCommerce Store in 2026: Step by Step Guide
narmin|
WooCommerce is still one of the most widely used eCommerce platforms in the WordPress ecosystem in 2026, and it is still free, flexible and easy to extend. What has changed is the setup flow itself: the onboarding wizard now asks different questions, Cart and Checkout are block-based by default, payments live under WooPayments, and High-Performance Order Storage is on by default. This refreshed guide walks you through the full setup process for a brand new WooCommerce store on a current WooCommerce stable (10.7 at time of writing, see the official releases page for the very latest) running on the current WordPress.
Without further ado, let's dive in.
What is WooCommerce?
WooCommerce is a free WordPress plugin that turns a regular WordPress site into a fully functional online store. WooThemes built the original plugin and Automattic, the company behind WordPress.com, acquired it in 2015. Today it is maintained by the Automattic-owned WooCommerce team and the wider open-source community.
It is a powerful, extendable eCommerce engine with a huge ecosystem of themes, extensions and third-party plugins. Because it sits inside WordPress, you keep full ownership of your content, your customer data and your store files.
WooCommerce is suitable for anyone who wants to sell products online, from solo creators and freelancers to medium-sized brands and large catalog operators. It ships with the essentials out of the box: inventory management, multiple payment gateways, shipping rules, tax calculations, product variations and reports.
It is available in dozens of languages and works with the best WordPress translation plugins, so it is a viable option for stores that operate in several markets. It also integrates cleanly with analytics, ad and CRM platforms, which is why a lot of growing brands keep it as the long-term store engine.
Who can use WooCommerce?
WooCommerce is the right fit if you want to set up an online store to sell products, services or subscriptions. Here are the most common scenarios where it works well:
Sell physical products. If your business sells physical goods, WooCommerce gives you a full storefront, product catalog, inventory tracking, shipping zones and tax rules from one dashboard.
Sell digital products. For software, e-books, music or any downloadable file, WooCommerce handles secure delivery so the file is only accessible to customers who have actually paid.
Sell services. If you offer services such as consulting, coaching or appointments, you can sell packaged service products and combine WooCommerce with a booking or scheduling extension to manage availability and payments.
Sell subscriptions. With WooCommerce Subscriptions (or a free alternative like SureCart) you can charge customers on a recurring basis and manage renewals, upgrades and cancellations.
Need deep customization. If you want full control over your store's design and functionality, WooCommerce gives you that through block themes, Site Editor templates, hooks for developers and thousands of plugins.
In short, WooCommerce is a versatile eCommerce platform suitable for stores of any size and almost any industry.
How to set up an online store using WooCommerce
This guide covers the full path, not just the plugin install. By the end you will have a working WooCommerce store that can take orders.
Here is what you need before you start:
A domain name
A web hosting account
An SSL certificate (almost always free with your host)
A WordPress install
The first two are the only items that will cost money in most cases. The WooCommerce plugin itself is free, but the rest of the stack around it is not.
Choosing a domain name
Your store needs a name and an address online. You can register a domain through a domain registrar like Namecheap, Cloudflare Registrar, Porkbun or directly through your hosting provider.
A few quick rules that still hold in 2026:
Keep it relevant. Your domain should reflect your store's niche and what you sell. Make the topic obvious to visitors.
Make it easy to spell and pronounce. Avoid hyphens, numbers and unusual spellings whenever possible.
Include keywords carefully. A keyword in the domain still helps recognition, but never at the cost of a strong brand name.
Prefer .com when available. If your brand .com is taken, a clean .store, .shop or .co works too.
Keep it short. Under 15 characters is a good target; shorter is even better.
Check trademark and availability. Use the registrar's search and a quick trademark lookup before you buy.
Think long-term brand. The domain is the URL your customers will type, share and remember for years.
Choose a web host to set up a WooCommerce store
Your host is where your store files and your database actually live. WooCommerce is more demanding than a static blog because it runs dynamic cart, checkout and inventory queries, so the hosting choice matters more here than for a content site.
Here is what to check before signing up:
Reliable provider with strong uptime. Look for documented uptime guarantees and read recent customer reviews.
Compatible PHP and database versions. WooCommerce's official server recommendations are PHP 8.3 or newer, MySQL 8.0 or newer (or MariaDB 10.6 or newer), the latest version of WordPress, a memory limit of 256 MB or higher, and HTTPS enabled. See the WooCommerce server requirements page for the current list.
Security features. Free SSL, server firewalls, malware scanning, daily backups and two-factor authentication on the hosting account.
Room to scale. The plan should let you upgrade resources easily when sales pick up. Managed WooCommerce plans usually scale better than basic shared hosting.
WooCommerce-friendly features. Things like automatic backups, one-click installs, staging environments, object caching (Redis or Memcached) and an Nginx or LiteSpeed stack help a lot.
Real 24/7 support. Live chat with humans who actually know WooCommerce, not only WordPress.
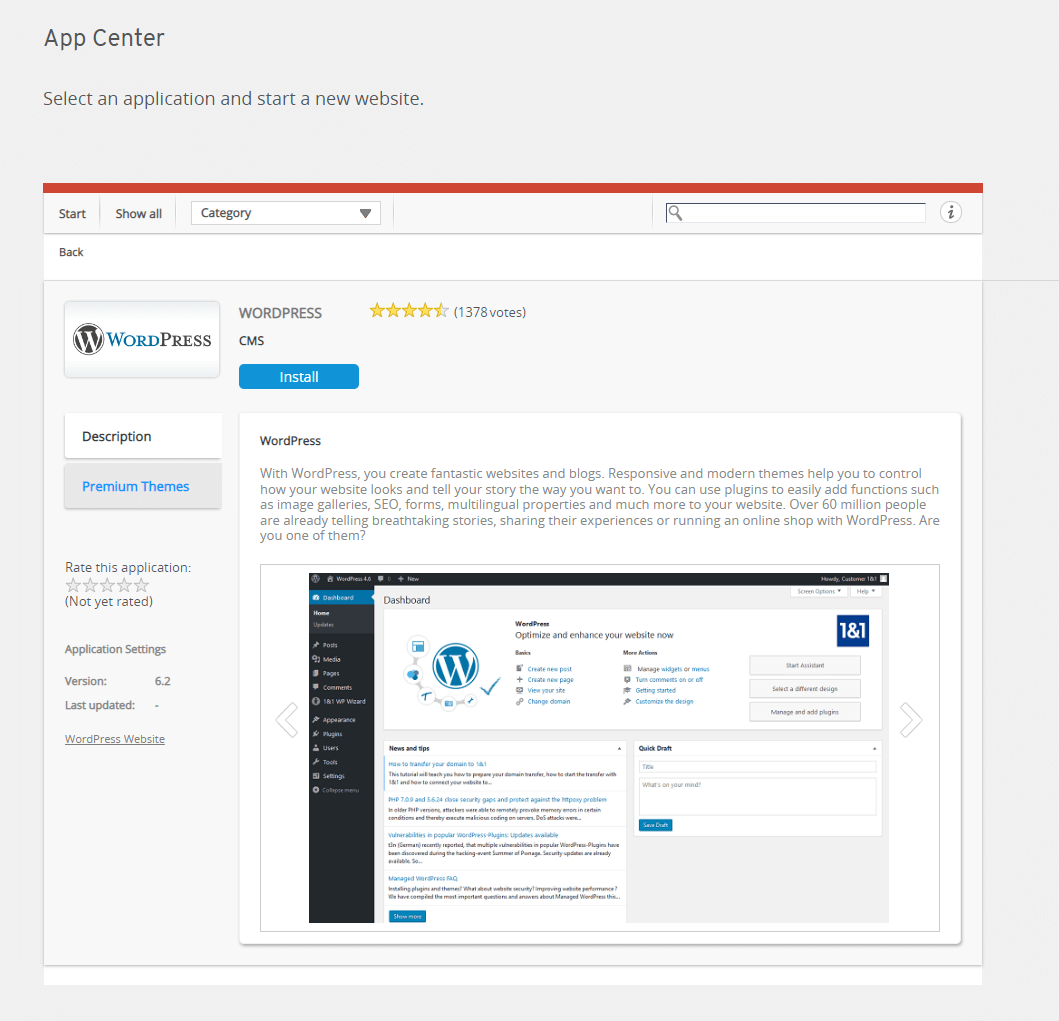
Once your hosting is ready, install WordPress. Almost every modern host offers a one-click WordPress installer in their dashboard. Log in to your hosting control panel (cPanel, hPanel, MyKinsta, SiteGround Site Tools, etc.), pick your domain and run the installer.
Most reputable hosts now include a free SSL certificate with the hosting plan, so you do not need to buy a separate SSL. Make sure HTTPS is enabled on your domain before you go live, because both WooCommerce and modern browsers require it for checkout.
Set up WooCommerce step by step
WooCommerce is a WordPress plugin, so installation works the same as any other plugin.
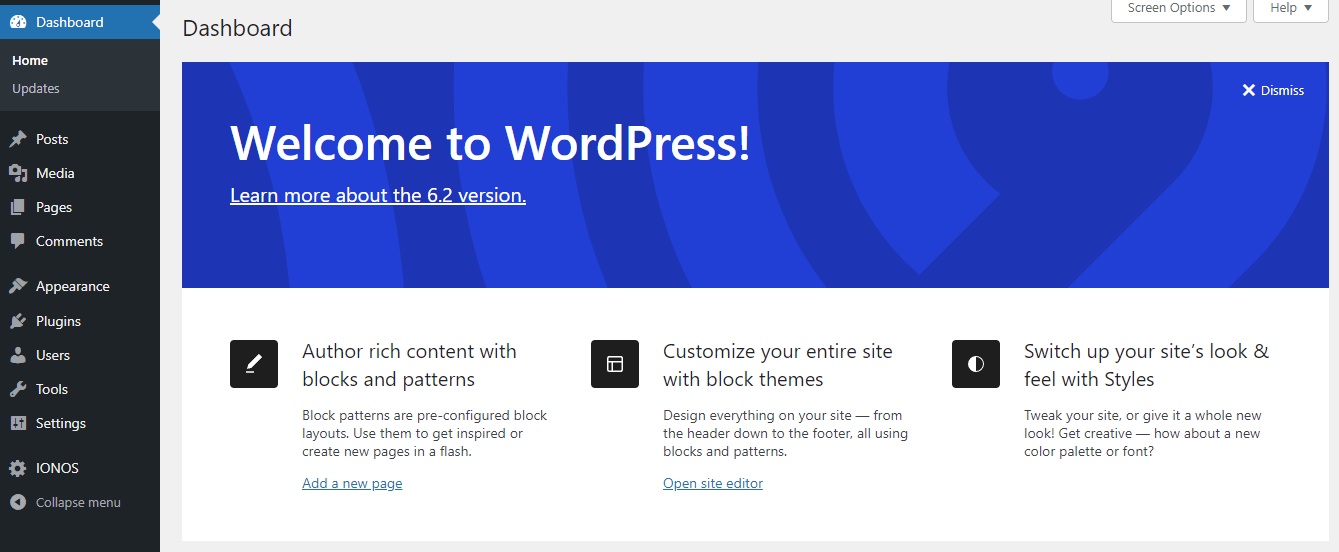
From your WordPress admin, go to Plugins > Add New and search for "WooCommerce".
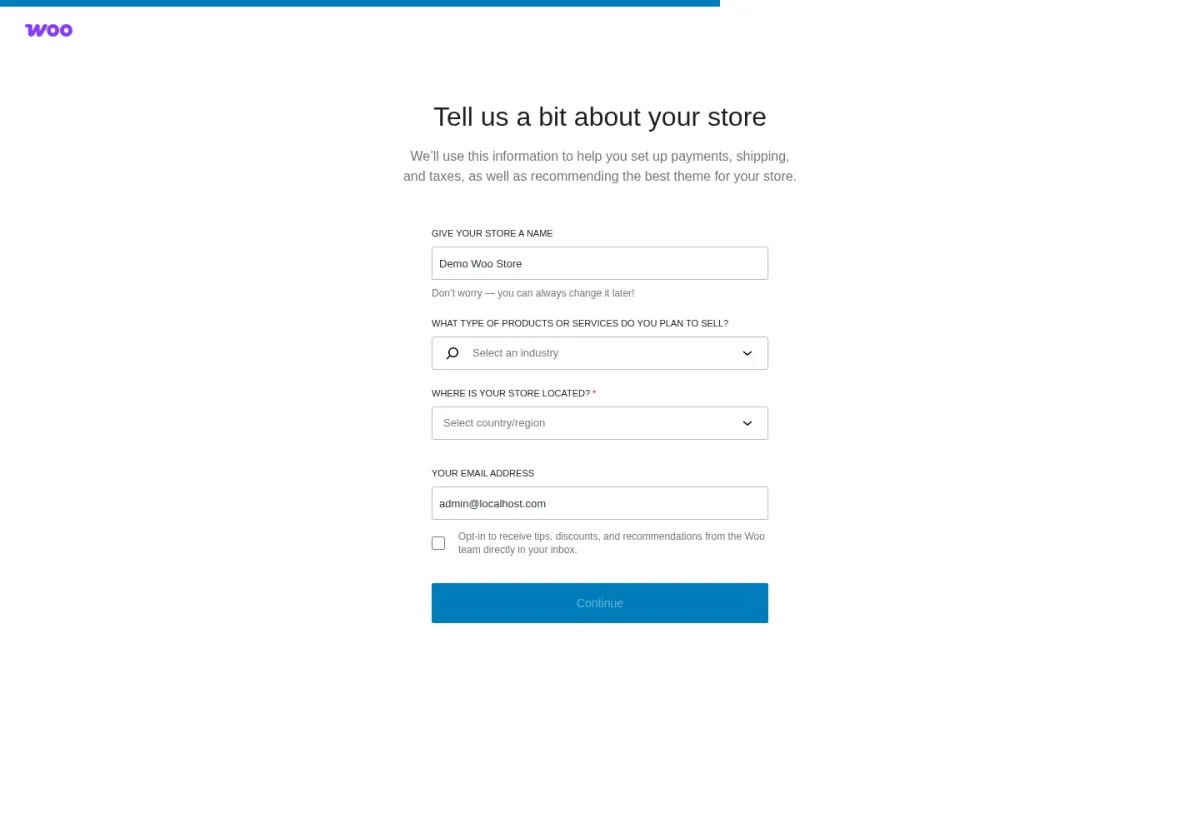
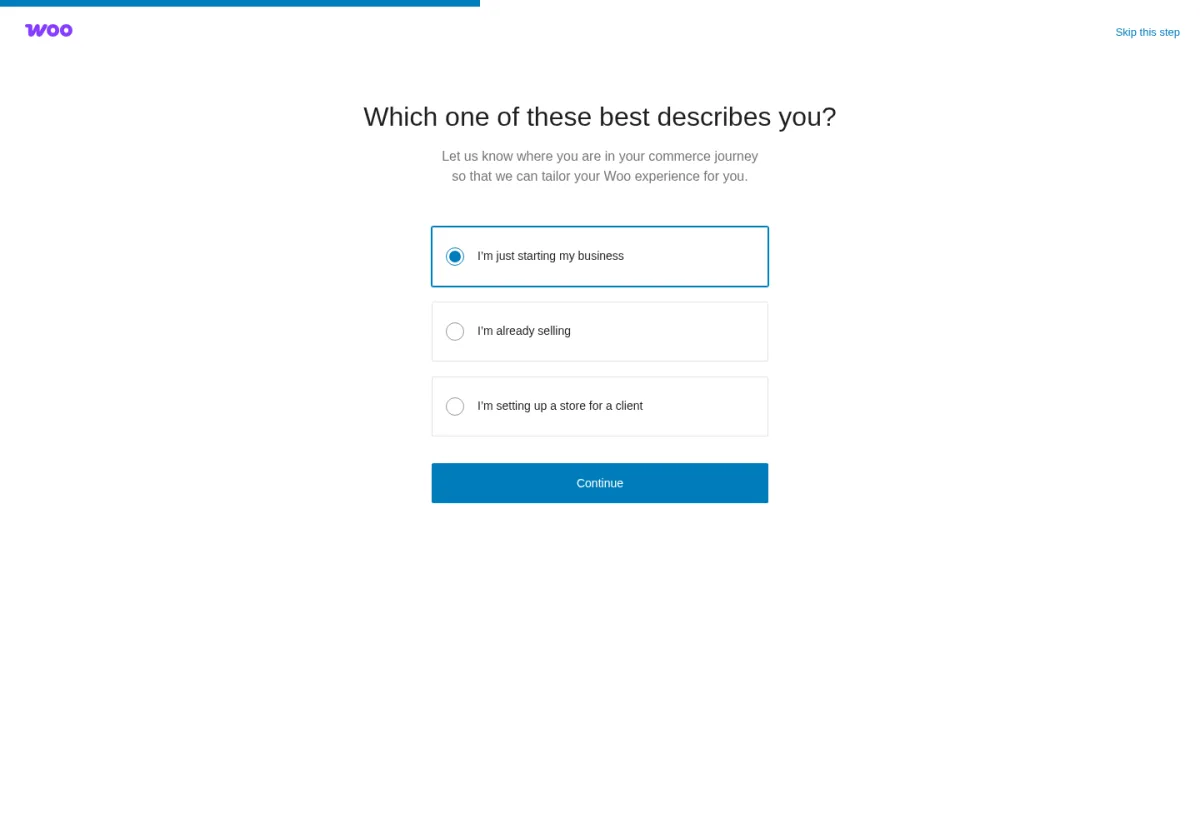
Click Install Now, then Activate. The first time you activate WooCommerce, it launches the onboarding wizard. The wizard takes a few minutes and uses your answers to pick smart defaults for currency, taxes and recommended extensions. The exact wording and screen order shift between WooCommerce releases, so think of the list below as the topics you will be asked about rather than as a strict step-by-step script.
You can expect the wizard to walk you through:
Store details. Country, region and postal/ZIP code. WooCommerce uses this to set your default currency and your tax base.
Industry and what you sell. Whether you sell physical products, digital products or downloads, services, subscriptions or a mix.
Catalog size and existing sales channels. Roughly how many products you plan to list and whether you are already selling on Amazon, Etsy, Shopify or in person. WooCommerce uses these answers to surface relevant tools and integrations later.
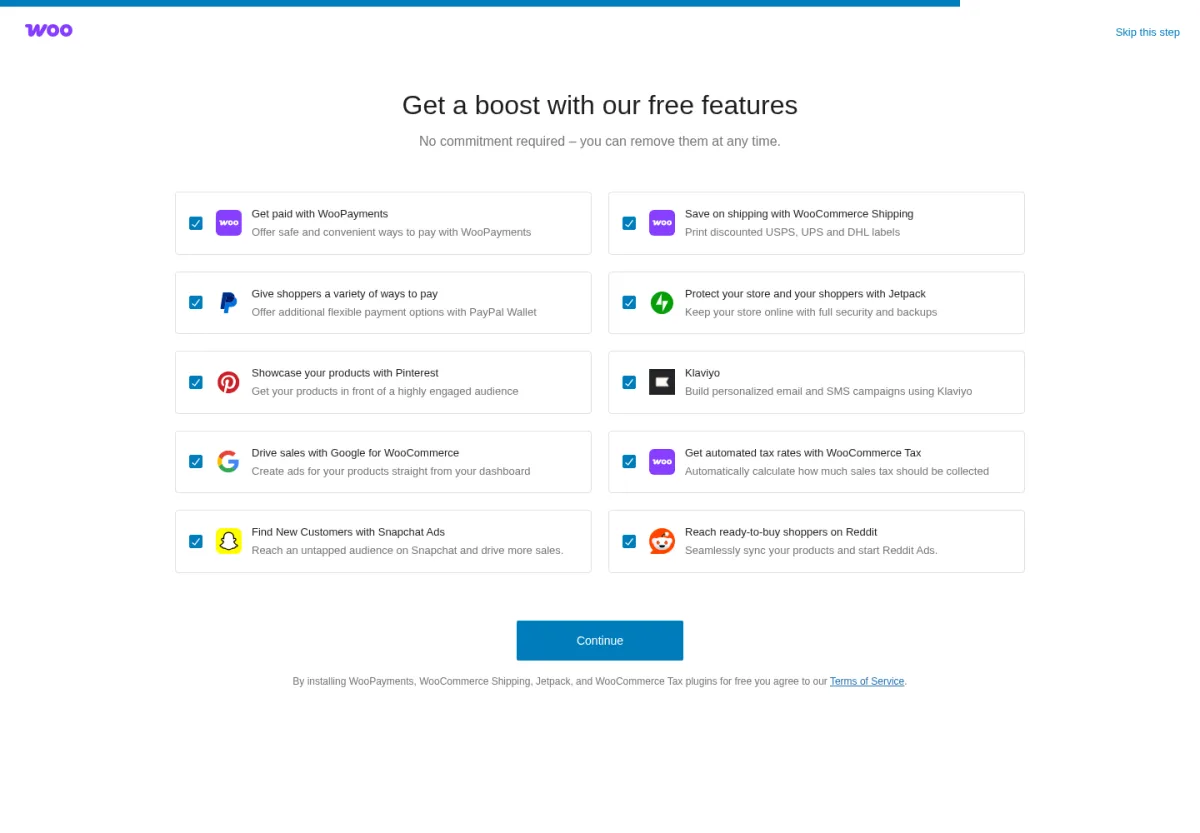
Recommended free extensions. Typically WooPayments (Automattic's native payment gateway), an email tool such as MailPoet or Mailchimp, and Jetpack for analytics and security. You can install everything now or skip and add the ones you actually need later. We cover the most useful add-ons further down.
Starting theme. WooCommerce now recommends a block-based theme such as the current Twenty Twenty default. You can stick with the recommended theme, or upload your own WooCommerce-ready WordPress theme at this point.
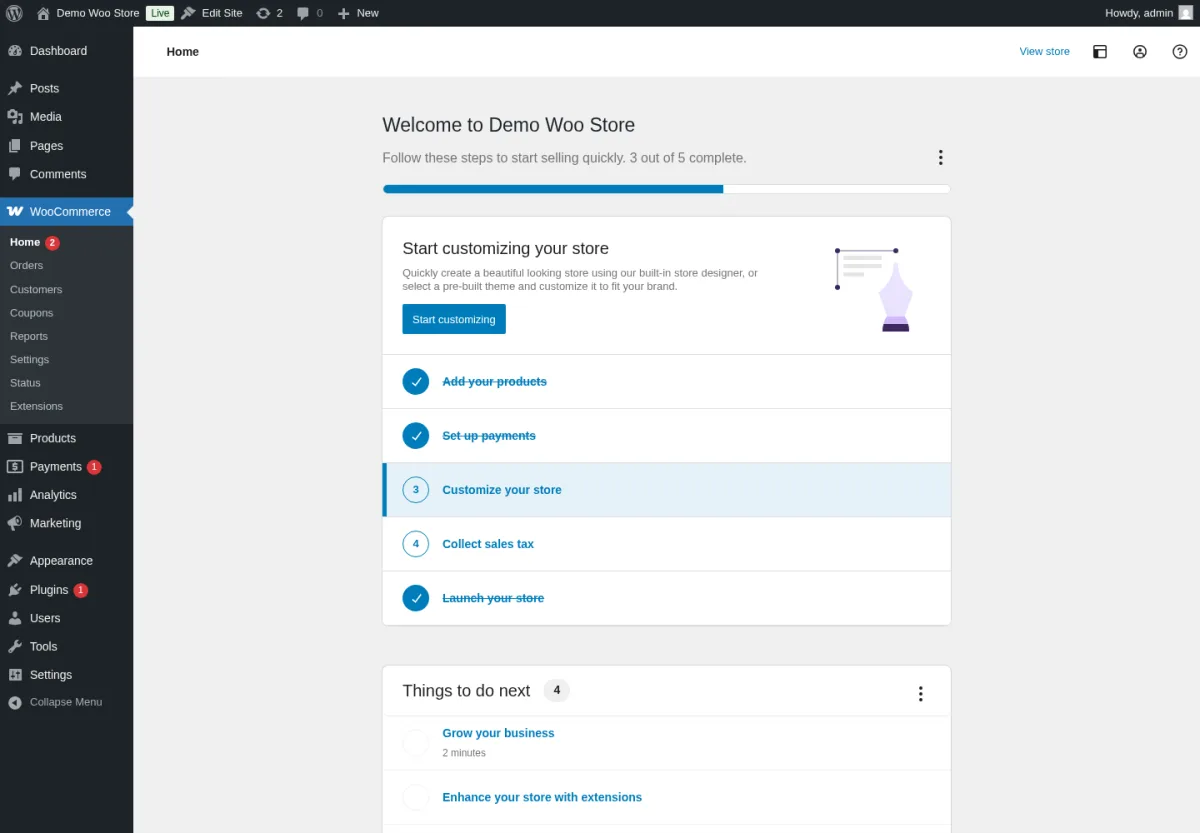
When the wizard finishes, WooCommerce drops you into the Home dashboard with a checklist of remaining setup tasks: add products, set up payments, set up tax, set up shipping and launch the store.
Adding products to your WooCommerce store
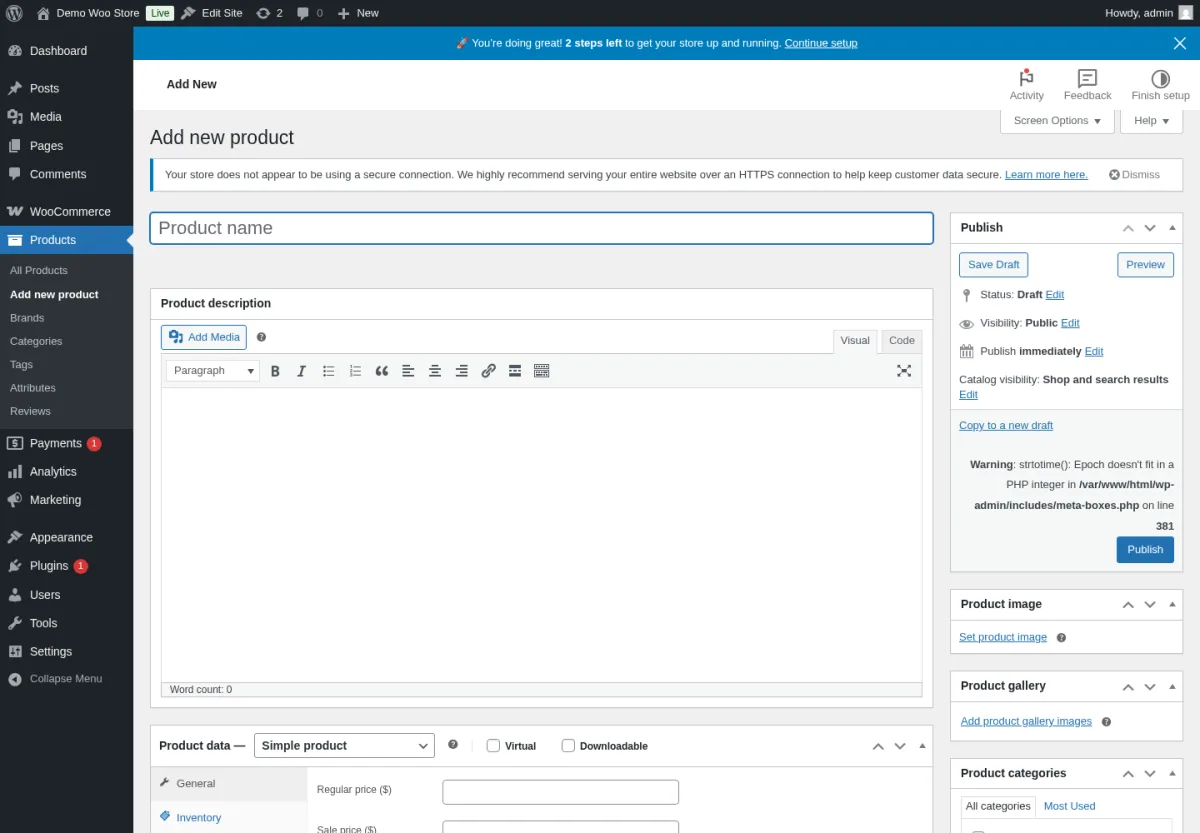
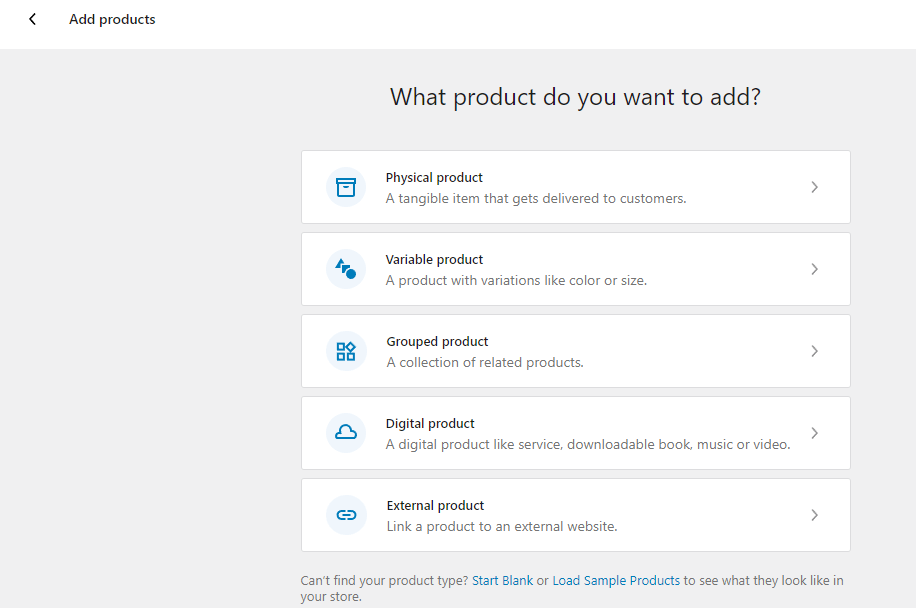
From the WooCommerce Home screen, click Add Products.
You can start from scratch, import a CSV or pick a template. Choose your product type and continue.
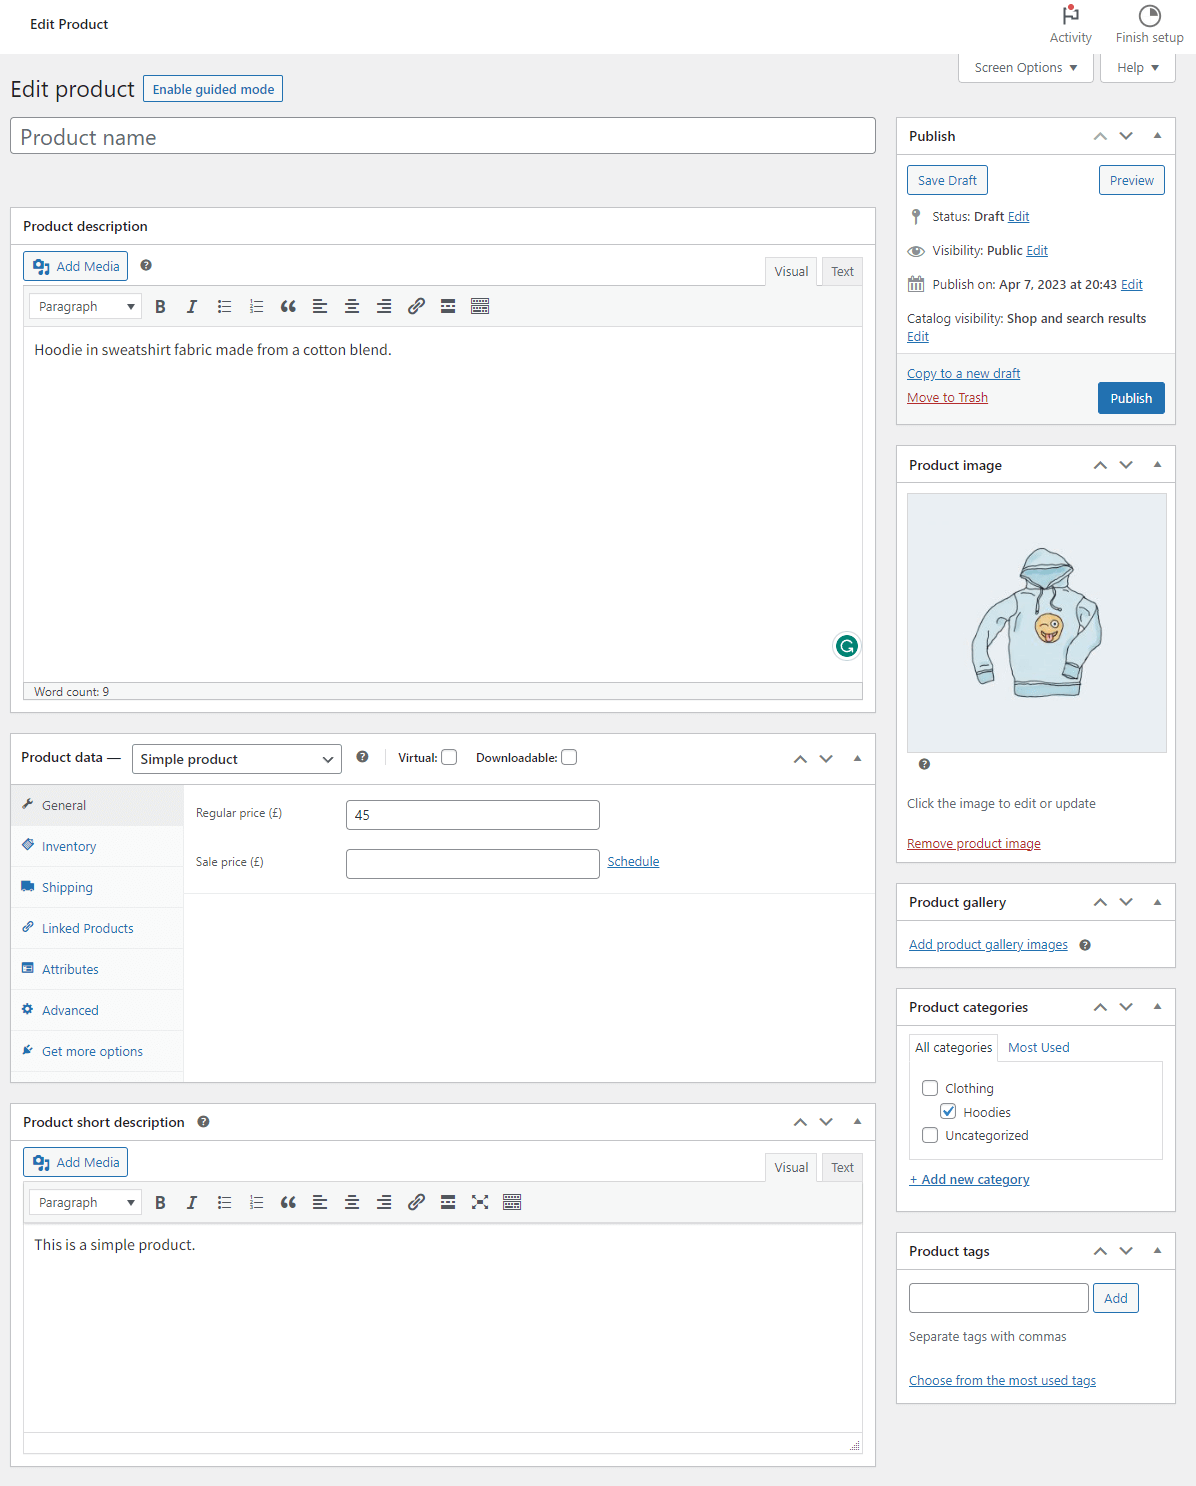
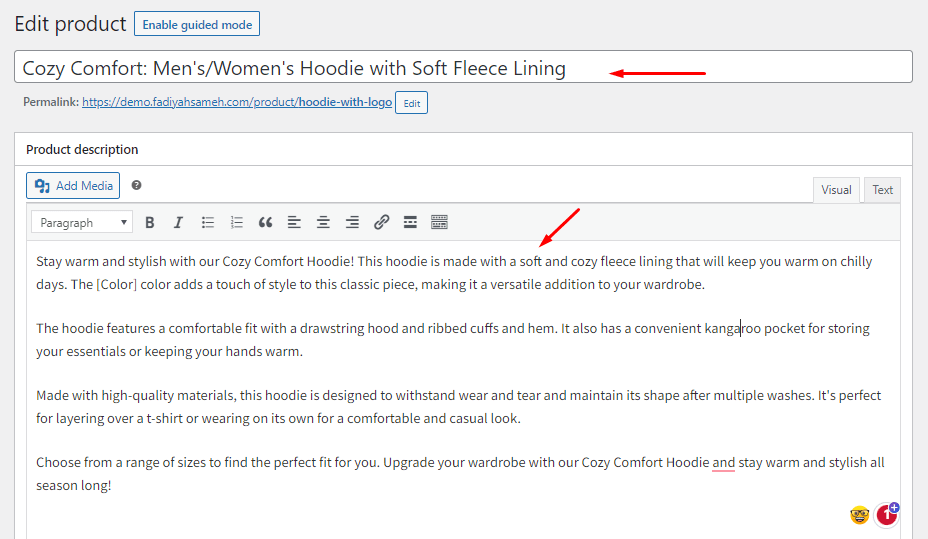
Fill in the product title, description, image, gallery, categories and tags. Set the regular price (and a sale price, if needed) in the Product Data panel.
Product types in WooCommerce
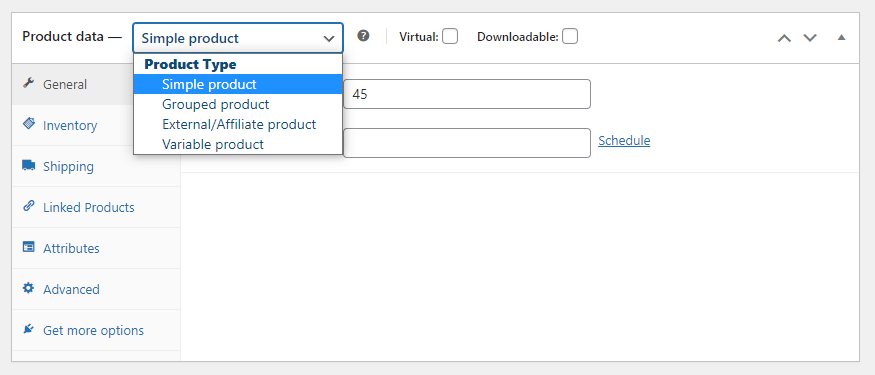
WooCommerce ships with four product types out of the box. Pick the one that matches what you are selling:
Simple products. Basic products with a single SKU and no variations. They can be physical or digital and have a fixed price. This covers most catalogs.
Grouped products. A collection of related simple products sold together on one page, such as a "starter kit" that bundles three accessories.
External or affiliate products. Products listed in your catalog but bought on a third-party site. Useful for affiliate stores and partner listings.
Variable products. Products with multiple variations like size, color or material. Each variation can have its own SKU, price, image and stock level.
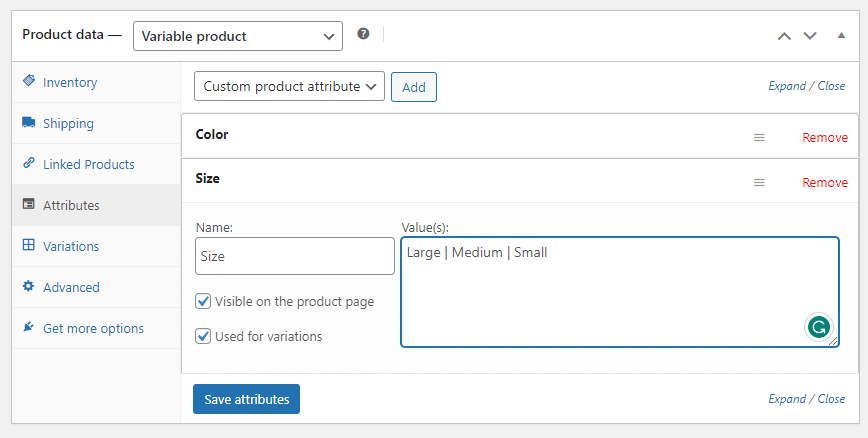
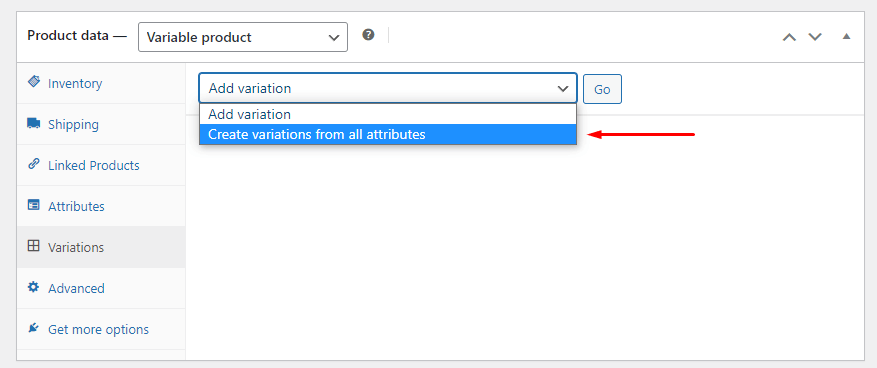
When you choose Variable product, the Product Data tabs change. Open the Attributes tab and create the attributes you need (for example, Size and Color), then mark each one as "Used for variations".
Go to the Variations tab and choose "Generate variations from all attributes" so WooCommerce creates every possible combination at once.
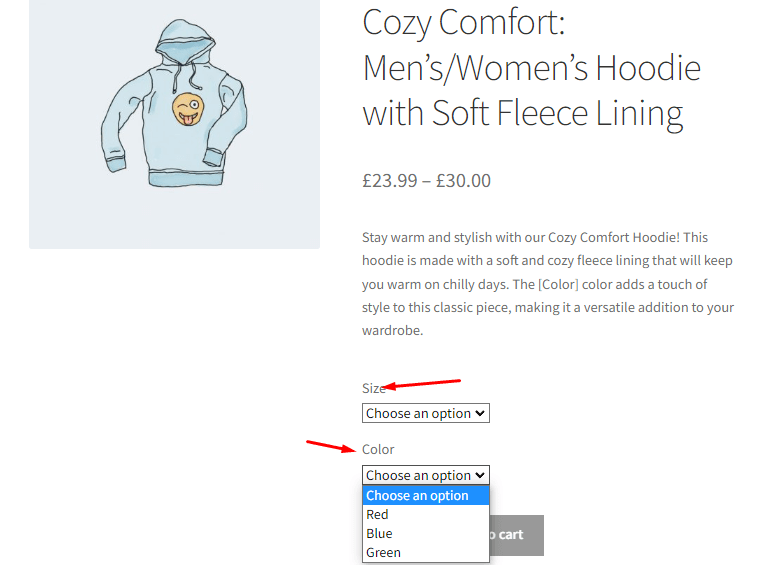
Open each variation, set its price, SKU, stock and a unique image if you want to show different photos for different colors.
Add the rest of the product details and click Publish. The product will appear on the storefront.
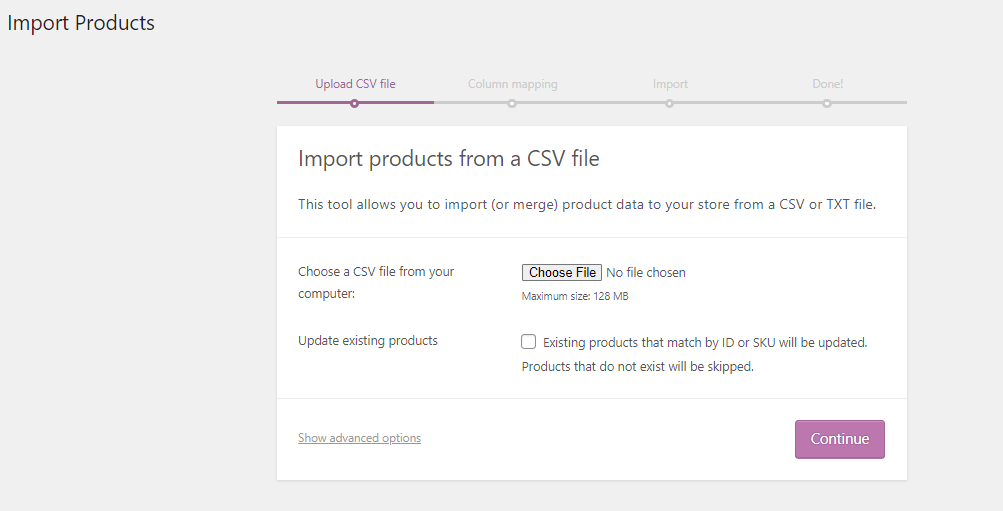
If you already have a CSV of products from another store or supplier, use Products > All Products > Import to load them in bulk. WooCommerce ships with a CSV importer that maps fields automatically.
Set up WooCommerce payments
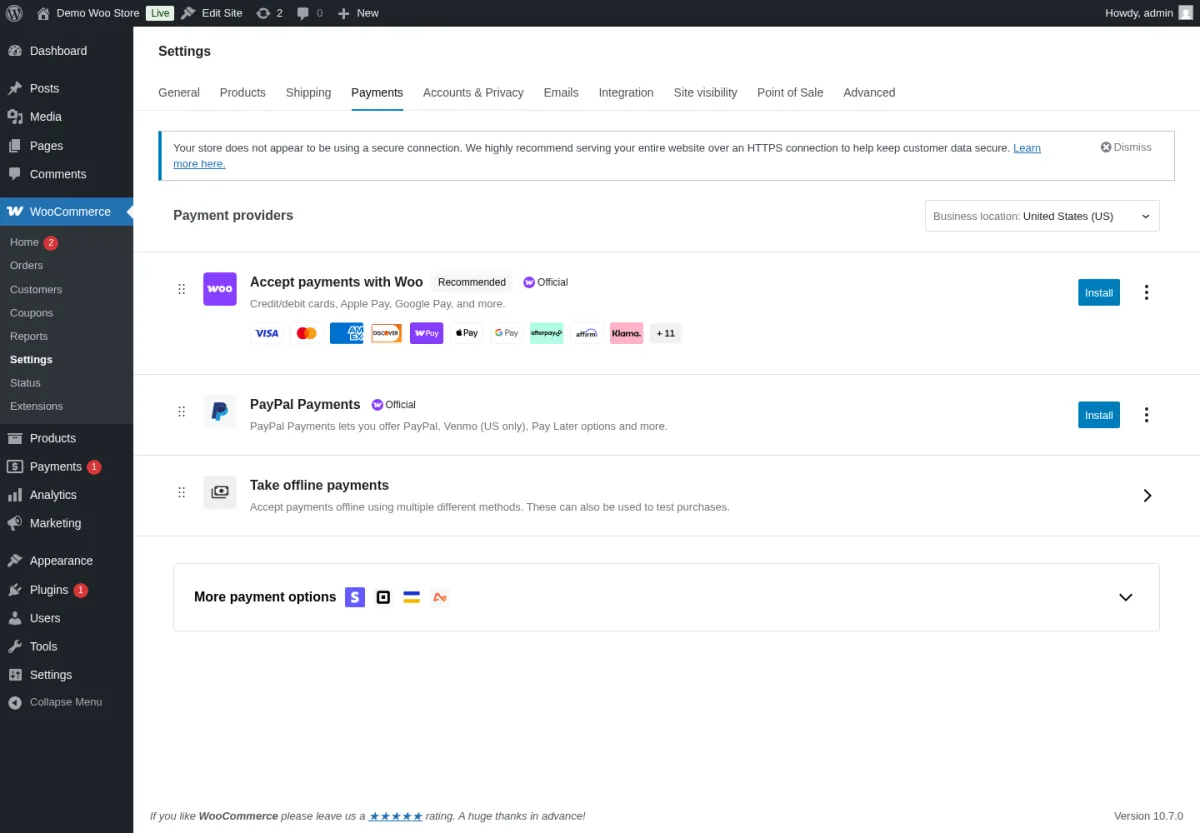
To configure payment methods, go to WooCommerce > Settings > Payments.
Out of the box, WooCommerce supports cash on delivery, direct bank transfer and check payments. One of its biggest advantages over hosted competitors is the sheer number of payment gateways available as official or third-party extensions.
For most new stores, the easiest way to start accepting cards and wallets is WooPayments, Automattic's native gateway. WooPayments supports Visa, Mastercard, Amex, Apple Pay, Google Pay and Link in supported countries, with no monthly fee. It was previously called "WooCommerce Payments" and was renamed in late 2023, so older tutorials will show the old name.
If you already use Stripe, PayPal, Mollie, Square or a local provider, install the matching gateway plugin from WooCommerce.com and enable it from the same Payments tab. Toggle each method on, save, and your customers will see it on the checkout page.
Set up tax in WooCommerce
Tax setup sounds intimidating, but WooCommerce makes the mechanical part simple. The hard part is making sure the rates you enter are correct for your jurisdiction.
Go to WooCommerce > Settings > General and tick "Enable taxes".
Save, and a new Tax tab appears in WooCommerce Settings.
From this tab you can choose how prices are entered (with or without tax), how tax is rounded, and which address WooCommerce uses to calculate tax. You have three options:
Store base address
Customer billing address
Customer shipping address
Product tax totals can be displayed on the product page, the cart and the checkout. You can manually add standard, reduced and zero rates in the rate tables, or use an automated tax service such as WooCommerce Tax, TaxJar or Avalara when you sell across multiple states or countries.
Sales tax is governed by a complex set of rules that vary by country, state and product category. If you sell in more than one region, an automated tax plugin is almost always worth the small monthly fee, because the legal risk of getting tax wrong is real.
Set up shipping for your WooCommerce store
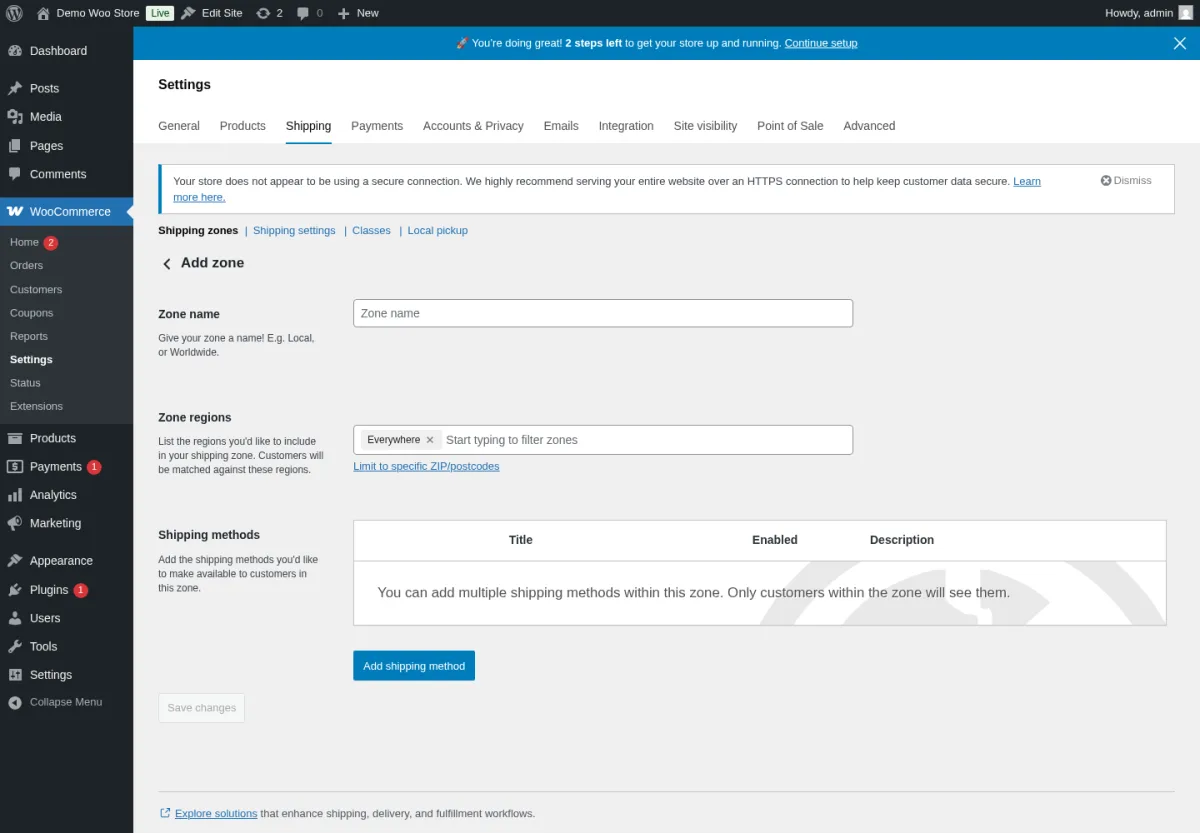
WooCommerce shipping is built around the idea of shipping zones: each zone is a country, region or postal-code range, and each zone has its own shipping methods (flat rate, free shipping, local pickup or a carrier plugin).
Go to WooCommerce > Settings > Shipping, click Add shipping zone, name the zone, pick the regions, and add the methods you want to offer in that zone.
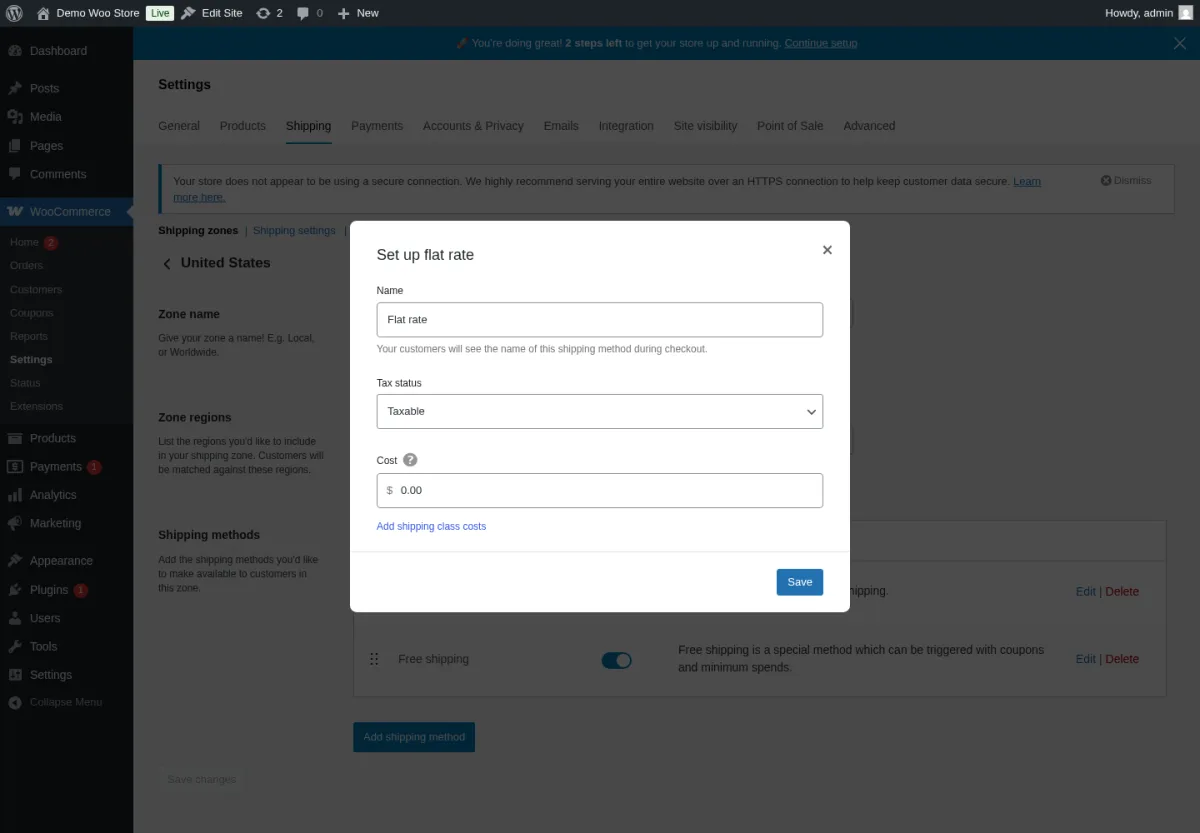
For example, you can set free shipping for local customers and a flat rate of £19.99 for the rest of the world. You can also charge by weight, by item, by class or per package.
If you need more granular shipping logic, such as per-product rules, conditional rates, fallback rates or shipping tied to user roles, look at advanced WooCommerce shipping options from WebAppick.
That covers the core store setup. Your store is technically ready to take orders. Place a test order in the back end before you start marketing and make sure the email confirmations, taxes and shipping all calculate the way you expect.
Must-have WooCommerce plugins and extensions
Add-ons and extensions are what give WooCommerce its real strength. They install exactly like any standard WordPress plugin, from Plugins > Add New. Below are the extensions we recommend for almost every new WooCommerce store in 2026.
Yoast SEO
Yoast SEO is a widely used WordPress SEO plugin that helps optimize products and pages for search engines. It generates XML sitemaps, lets you edit meta titles and descriptions per product, adds Open Graph and Twitter Card tags, and ships breadcrumbs that work with WooCommerce out of the box. If you want to compare the leading options, we have a head-to-head of free SEO plugins for WordPress compared.
Jetpack
Jetpack from Automattic bundles performance, security and analytics features into one plugin. It includes brute-force attack protection, downtime monitoring, image CDN, and basic site stats. Many of the modules are free, and most installs only need a small subset of them.
CTX Feed: WooCommerce product feed manager
You can reach millions of buyers without running classic Google text ads by listing your WooCommerce products on marketplaces (Amazon, eBay, Target), price comparison engines (Google Shopping, PriceGrabber) and social platforms (Meta, Pinterest, TikTok).
You can build and maintain those feeds straight from your WordPress dashboard with a WooCommerce product feed manager plugin such as CTX Feed. It supports 130+ channels, auto-updates feeds when products change, and lets you map your WooCommerce fields to each channel's exact required schema. Done right, this typically lifts conversions because the data stays in sync everywhere customers see it.
WooCommerce Stripe Gateway
WooPayments covers most modern card and wallet flows, but the standalone Stripe Gateway plugin is still worth installing if you already have a Stripe account, need direct Stripe features (such as Radar fraud rules, custom Stripe products, or specific local payment methods like SEPA, iDEAL or Klarna in certain regions), or want a dedicated Stripe dashboard for reconciliation.
WooCommerce Mailchimp / MailPoet
Email marketing is still one of the highest-ROI channels for an online store. Mailchimp's WooCommerce integration syncs customers, products and order data into Mailchimp so you can run abandoned cart and post-purchase flows. If you would rather keep email inside WordPress, MailPoet (also owned by Automattic) does the same job with a tighter WooCommerce integration and a generous free tier. For a wider look at the options, see our list of email and newsletter plugins for WordPress.
W3 Total Cache
Store speed has a direct effect on conversions, especially on mobile. W3 Total Cache improves load time by caching pages, minifying CSS and JS, supporting CDN integration and using object caching with Redis or Memcached when your host supports it. Some users prefer WP Rocket or LiteSpeed Cache as alternatives. For a fuller deep dive, see our WordPress speed optimization guide and our roundup of free plugins to speed up your WordPress site.
WooCommerce Multilingual (WPML)
If you want a multilingual store, WooCommerce Multilingual works on top of WPML to translate products, categories, attributes, emails and checkout strings. It supports currency switching per language, which is useful for stores selling in different regions at the same time.
UpdraftPlus
Data loss is catastrophic for an eCommerce site because you lose orders, customers and inventory state. UpdraftPlus runs scheduled backups of your files and database and stores them offsite on Google Drive, Dropbox, S3, Backblaze or your own SFTP. Set it to back up daily, keep at least seven snapshots, and test a restore at least once before you really need it.
One last note: HPOS and block-based Cart/Checkout
Two changes are worth knowing about before you start adding third-party plugins:
High-Performance Order Storage (HPOS) is the default for new WooCommerce stores starting with WooCommerce 8.2. It moves orders into dedicated tables so large catalogs and high-volume stores stay fast. To check whether your installed extensions support it, open WooCommerce > Settings > Advanced > Features. If an installed plugin is not HPOS-compatible, the "Order data storage" panel disables the HPOS option and surfaces a "View and manage" link to the incompatible plugins. Verify on staging first if you depend on older order-related add-ons, and ask the vendor if they support HPOS before you switch a production store.
The Cart and Checkout blocks are the default in fresh installs. They render with Gutenberg, look better on mobile and are easier to customize visually. Most modern payment and shipping plugins already work with them. If you rely on a legacy shortcode-based extension that has not added block support yet, you can temporarily switch a specific page back to the classic shortcode while you migrate.
Frequently Asked Questions (FAQs)
How many products can I add to WooCommerce?
There is no hard limit on the number of products you can add to WooCommerce. Real-world stores run with anywhere from a handful of SKUs to hundreds of thousands. What matters in practice is the size of your hosting plan, the database engine, whether HPOS is enabled and whether you have object caching configured. For very large catalogs, plan on a managed WooCommerce host with Redis enabled.
How does WooCommerce compare to Shopify or Magento in 2026?
WooCommerce is a plugin for WordPress, so you keep full control of your store, your data and your hosting choice, and you avoid per-sale platform fees. Shopify is a hosted SaaS platform with the lowest setup effort but a recurring monthly fee and platform fees on some plans. Adobe Commerce (formerly Magento) is the heavyweight option, best suited for very large catalogs and big in-house dev teams. For most small and mid-sized stores in 2026, WooCommerce is the most cost-effective and flexible long-term choice; Shopify is the simplest for "I just want to ship products today".
Is WooCommerce really free?
The core WooCommerce plugin itself is free and open-source. What costs money is everything around it: your domain, your hosting, premium themes, premium extensions, and payment processing fees from your gateway. The exact monthly cost depends entirely on which host you pick and which extensions and gateways your store needs, so plan on at minimum a domain (usually a low annual fee) plus your hosting plan and the per-transaction fees charged by your chosen payment provider.
What is WooPayments and do I have to use it?
WooPayments is Automattic's native payment gateway for WooCommerce. It supports cards, Apple Pay, Google Pay and Link with no monthly fee in supported countries. You do not have to use it. Stripe, PayPal, Mollie, Square and most local providers all have official WooCommerce gateways and work equally well; pick whatever matches your customers' preferred payment methods and your existing accounts.
Do I need a separate SSL certificate for WooCommerce?
In 2026, no, in almost every case. Reputable hosts include free Let's Encrypt SSL with every plan, and most issue and renew the certificate automatically. WooCommerce and modern browsers both require HTTPS for checkout, so confirm SSL is active on your domain before you start taking orders.
Wrap up
Setting up a WooCommerce store can sound intimidating the first time, but the workflow itself is short: pick a domain, pick a host, install WordPress, install WooCommerce, walk through the onboarding wizard, add products, switch on payments, set tax, set shipping. The plugins we listed above will then cover SEO, speed, email, feeds and backups for the long run. When you are ready to extend the store itself, our roundup of the best WooCommerce plugins covers the add-ons we hands-on tested for email, wishlists, optimized checkout, swatches, advanced coupons, modular toolkits and PDF invoices.
If you have suggestions or questions about your own setup, drop them in the comments. We update this guide regularly, so feedback from readers running real stores helps us keep it sharp.