How to Install a WordPress Theme in 2026: Step-by-Step Beginner's Guide

After creating a WordPress website, the very first thing most people want to do is change how it looks. That is the job of a WordPress theme: it controls your site's layout, typography, colours, header, footer, and (for newer block themes) every template a visitor sees.
In 2026 WordPress ships with a built-in theme installer that handles the whole process from inside your admin area. You almost never need to touch FTP. This guide walks through the three real install methods (Theme Directory, ZIP upload, and SFTP), explains the one big 2026 difference (block themes vs classic themes), and finishes with updates, removal, troubleshooting, and a short FAQ. The steps below match WordPress 7.0 (released May 20, 2026); the install flow is unchanged from the WordPress 6.x line, so older 6.x admins follow exactly the same clicks.
Before you install anything, make sure you are logged in as an administrator. The role is labelled "Administrator" on Users > All Users. Editors, authors, and contributors cannot install or switch themes on a stock WordPress install.
Pick a theme before you install one
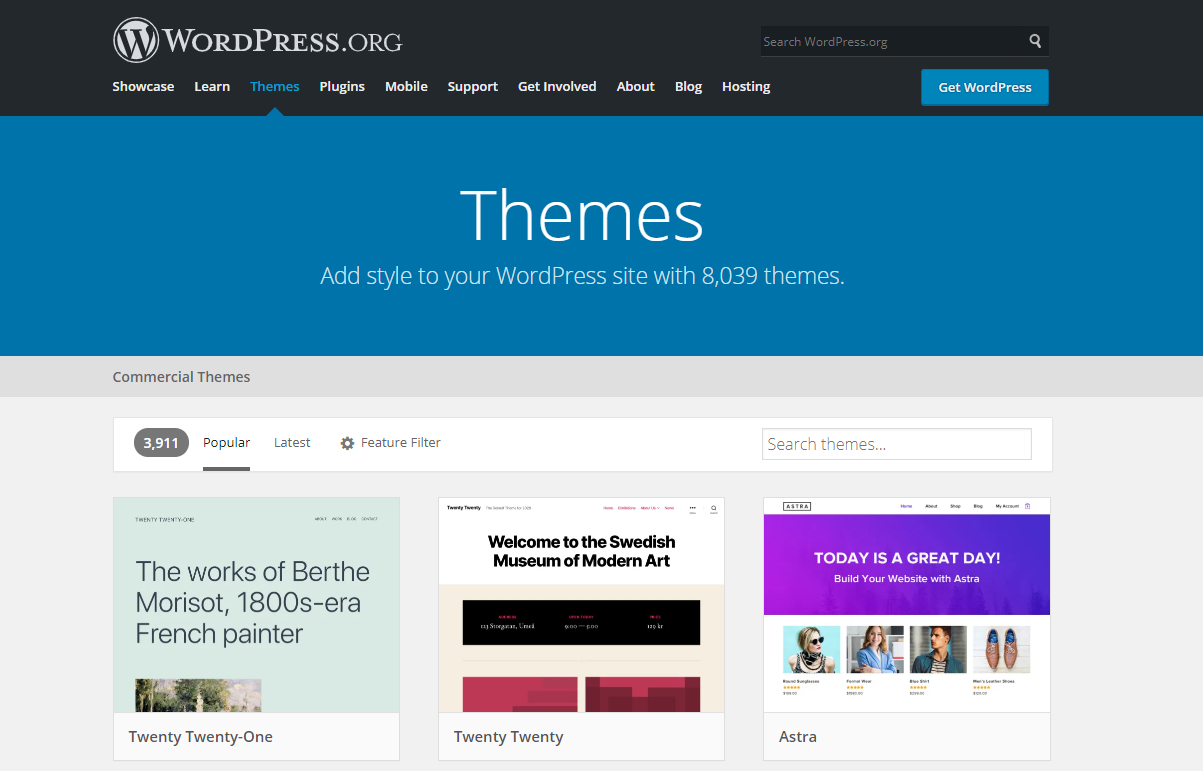
Finding the right theme is harder than installing it. The WordPress Theme Directory alone hosts more than 12,000 free themes, and that is before you look at premium marketplaces.
A quick way to narrow the field:
- If you want a free, fast-loading block theme to start with, browse our shortlist of the best free WordPress themes.
- If you want a premium theme with more design options, demos, and a support team behind it, see our roundup of the best premium WordPress themes.
Once you know which theme you want, come back to this guide and pick the method that matches where the theme comes from.
Quick check: is your site ready for a new theme?
Before switching themes on a live site, open Tools > Site Health > Info in your WordPress admin. Two numbers matter:
- WordPress version. Run the latest available WordPress release (7.0 as of May 2026), or at minimum a release still receiving security updates from WordPress.org. Most modern themes (especially block themes) require WordPress 6.2 or higher, and many premium themes now require 6.4 or higher.
- PHP version. Per the current official WordPress.org requirements, the minimum supported PHP version is 7.4 (the Make/Core baseline as of WordPress 7.0), and PHP 8.3 or higher is recommended. Do not run a production WordPress site on PHP 7.3 or lower; if Site Health shows anything below PHP 7.4, ask your host to upgrade before you install a new theme. If you can, jump straight to PHP 8.3 or 8.4 so future plugin and theme releases stop warning you.

If both numbers are green, take a fresh backup. Theme switches almost never break a site, but the few that do can wipe widget assignments, menu locations, and Customizer settings, so a backup is cheap insurance.
Block themes vs classic themes (the one 2026 thing you need to know)
WordPress now ships with two flavours of theme, and the difference changes which screen you use to customise the design after install:
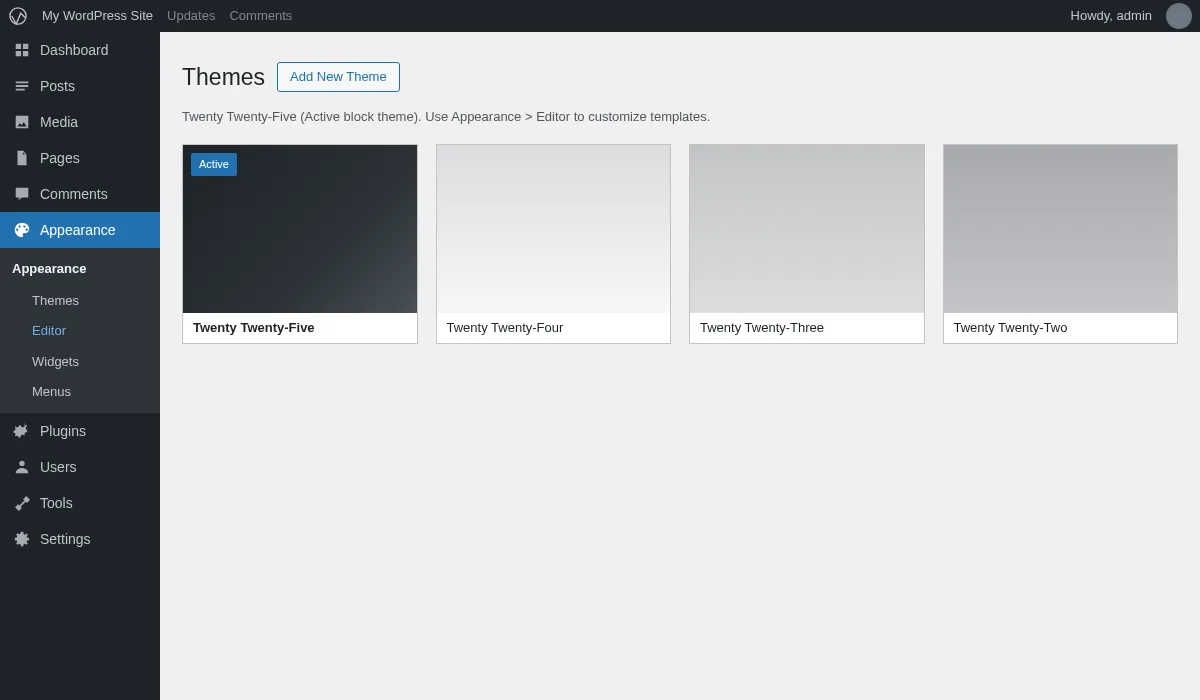
- Block themes (also called Full Site Editing themes). Twenty Twenty-Five (the current default theme on a fresh WordPress 7.0 install) and the previous Twenty Twenty-Four are both block themes, as are most newer themes from the WordPress.org directory. After activation you customise the whole site, including the header, footer, and templates, in Appearance > Editor (the Site Editor).
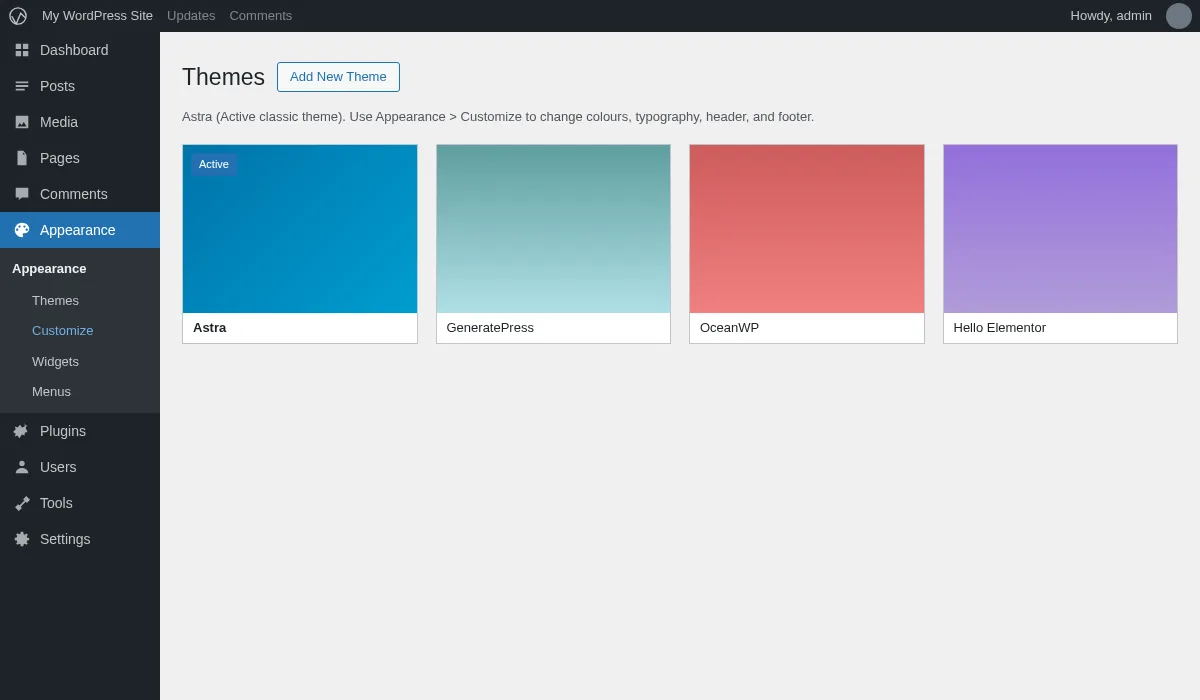
- Classic themes. Older themes and many premium themes are still classic themes. After activation you customise the design in Appearance > Customize (the Customizer), and templates are edited in PHP files by the theme author.
You install both kinds the same way using any of the three methods below. The only difference is where you go to tweak the design afterwards. If you cannot decide which kind to start with, pick a block theme. New WordPress sites in 2026 are easier to maintain on block themes because layout changes do not require a developer.
Method 1: Install a theme from the WordPress Theme Directory
This is the safest and fastest method for any free theme listed on the official directory.
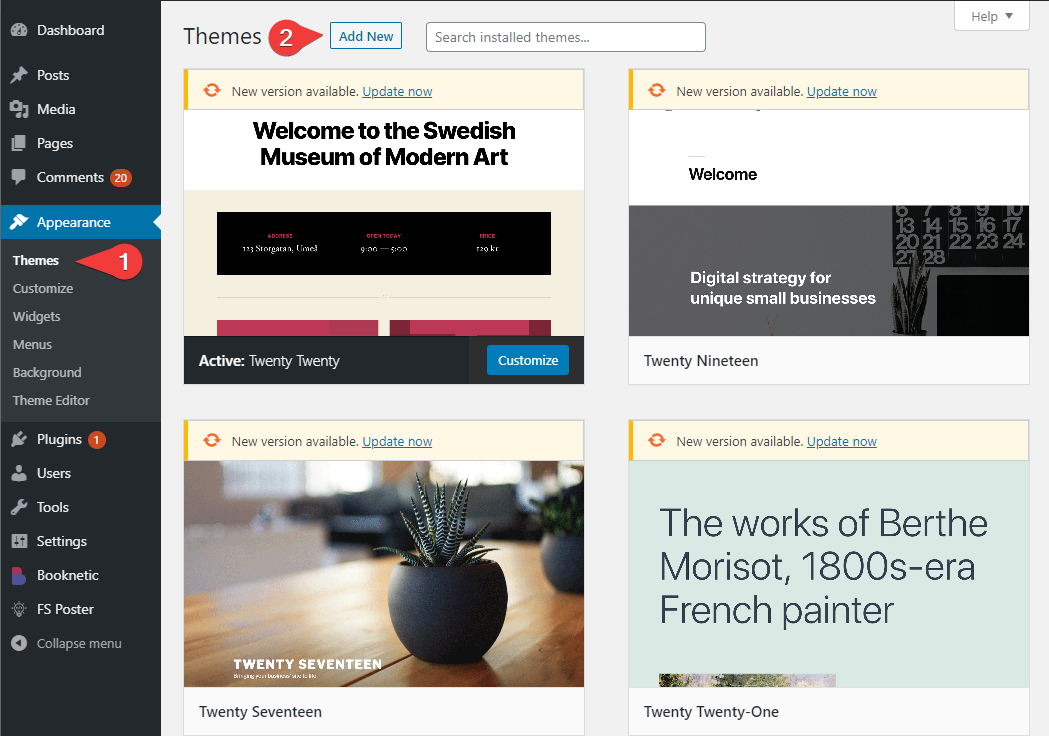
- In your WordPress admin dashboard, open Appearance > Themes in the left sidebar.
- Click the Add New Theme button at the top of the page.
- Use the search box at the top right to find a theme by name, by author, or by feature (for example, "magazine", "blog", or "ecommerce"). You can also browse the Popular, Latest, and Block Themes tabs.
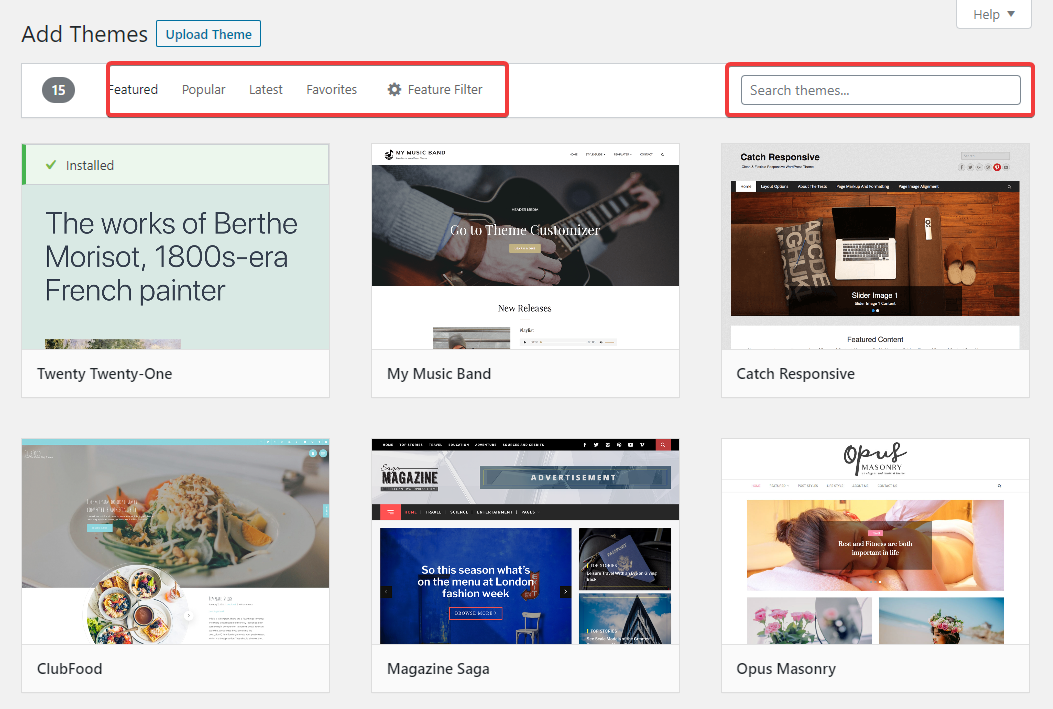
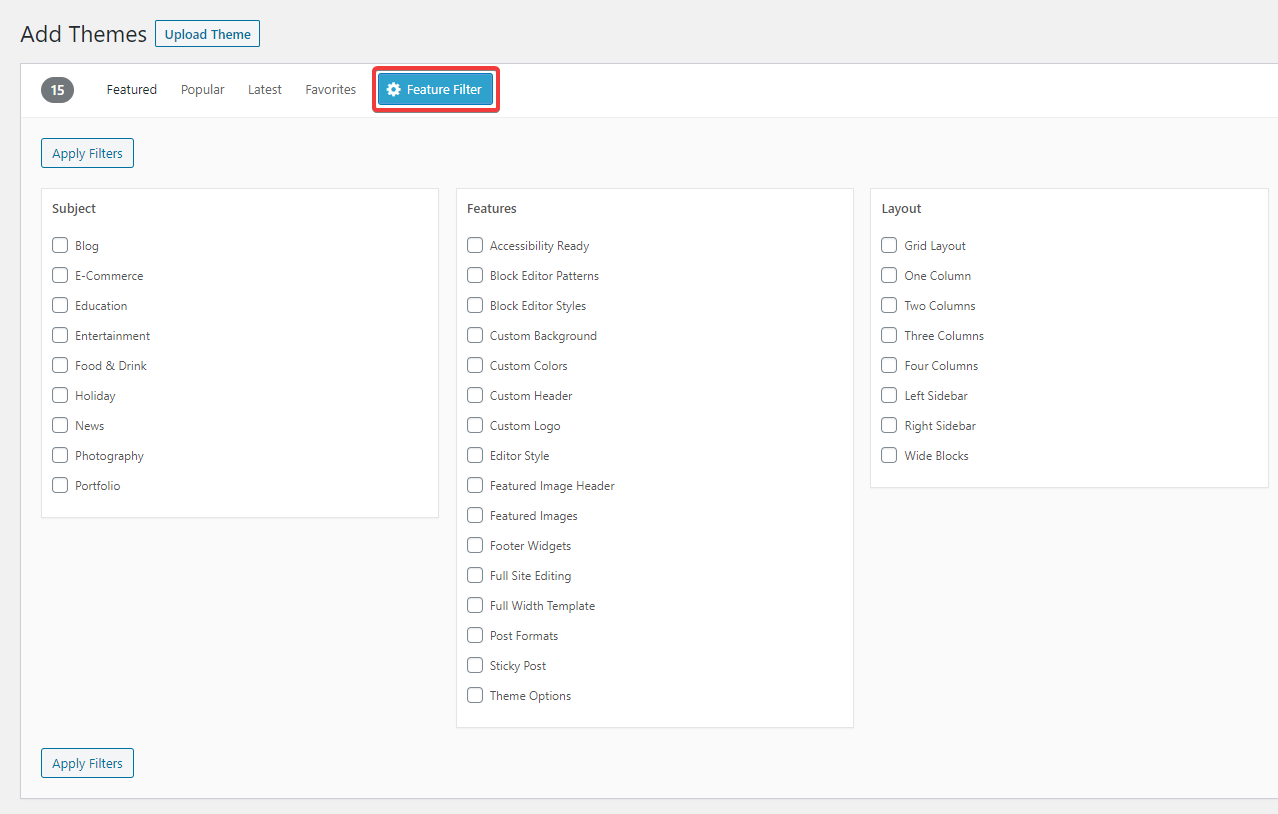
- To narrow the list further, click Feature Filter. The panel groups options into Subject (Blog, eCommerce, Education, etc.), Features (Block Editor Styles, Custom Colors, Full Site Editing, etc.), and Layout. Tick the boxes you care about, then click Apply Filters.
- Each result card shows the theme name, a screenshot, a star rating, and (when you hover) a Details and Preview link plus an Install button. Click Live Preview first if you want to see the theme against your own content before committing.
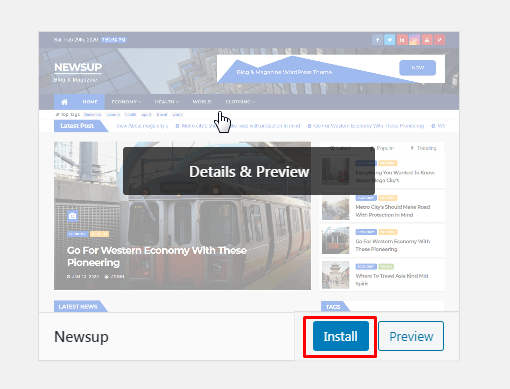
- Click Install. WordPress downloads the theme to your server in a few seconds. The Install button is then replaced by an Activate button.
- Click Activate. The theme is now live on your site.

If the new theme is a block theme, you will see a Customize design button that opens the Site Editor. If it is a classic theme, you will see a Customize button that opens the Customizer. Either screen is where you go next to actually shape the design.
Method 2: Upload a theme ZIP file from your computer
Use this method for premium themes you bought from a marketplace or the theme author's site, or for any theme you downloaded as a .zip file (for example, from a GitHub release).
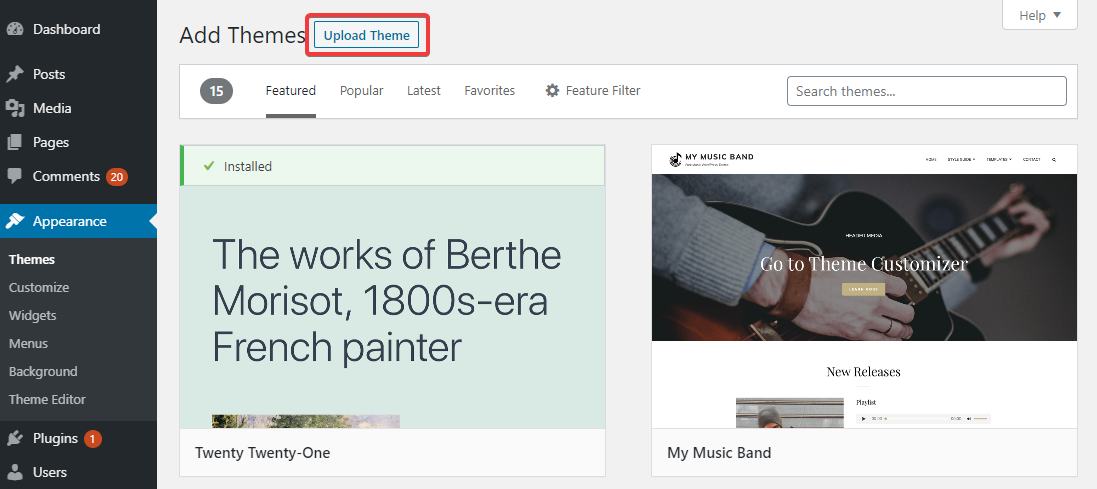
- Open Appearance > Themes in the admin sidebar.
- Click Add New Theme at the top.
- Click the Upload Theme button that appears next to the page title.
- Click Choose File, pick the theme's .zip archive from your computer, then click Install Now.

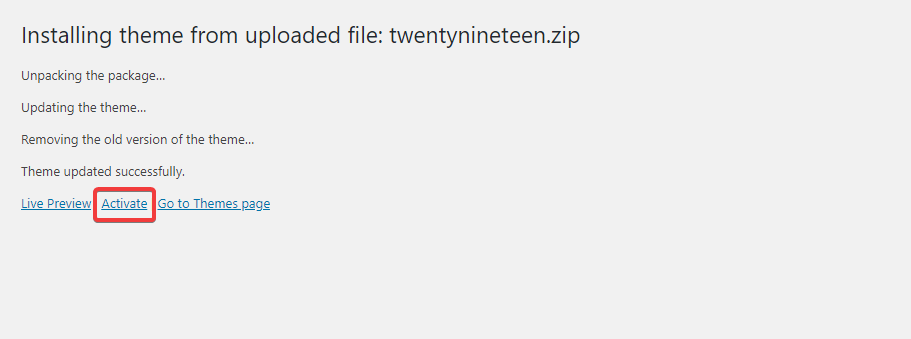
- WordPress uploads the file, extracts it into
/wp-content/themes/, and shows a success screen with Live Preview, Activate, and Return to Themes page links. - Click Activate to switch your site to the new theme.
If the upload fails with "The uploaded file exceeds the upload_max_filesize directive", your host has set a small PHP upload limit. Either ask your hosting provider to raise upload_max_filesize and post_max_size to at least 64M, or use Method 3 below.
A common premium-theme gotcha: some vendors ship the theme inside a "package" .zip that also contains a license PDF, child theme, and demo content. Open the outer .zip first and upload only the inner theme .zip (the one that contains a style.css and functions.php at the top level).
Method 3: Manual install with SFTP (only when the first two methods fail)
This used to be a standard install path. In 2026 it is almost never necessary, and you should treat it as a last resort. Use it only when:
- Your host blocks file uploads from the admin area entirely.
- The theme .zip is too big for your server's upload limit and your host refuses to raise it.
- You need to install a theme while WordPress is in a broken state (white screen, critical error) and you cannot reach the admin.
Use SFTP (SSH File Transfer Protocol), not plain FTP. SFTP is encrypted and is offered by every reputable WordPress host in 2026. A free client like FileZilla or Cyberduck works on Windows, macOS, and Linux.
- Get your SFTP host, port, username, and password from your hosting control panel. The port is normally 22.
- Download the theme .zip to your computer, then unzip it. You should end up with a single folder named after the theme (for example,
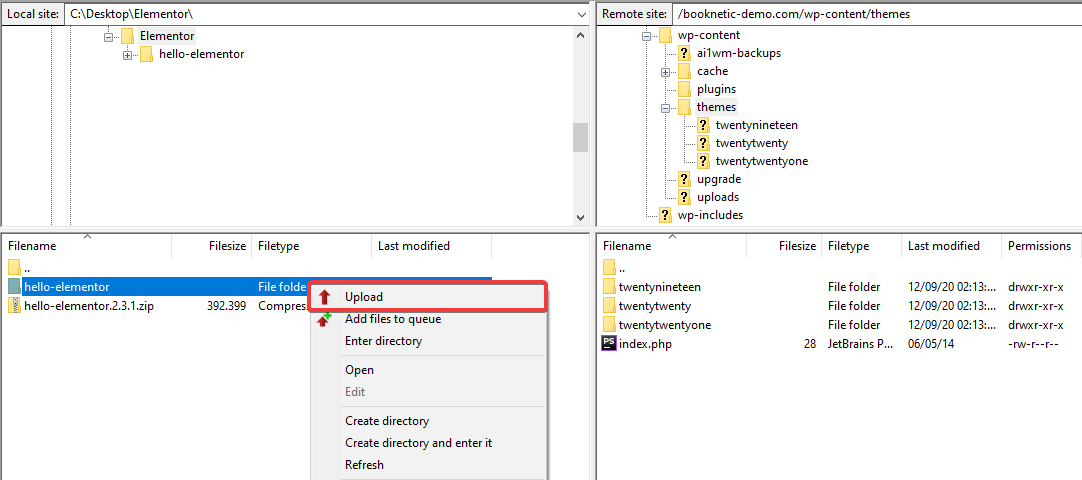
astra). - Open your SFTP client and connect to your server. Navigate to
/wp-content/themes/inside your WordPress install directory. - Drag the theme folder (not the .zip) from your computer into the
/wp-content/themes/folder on the server.
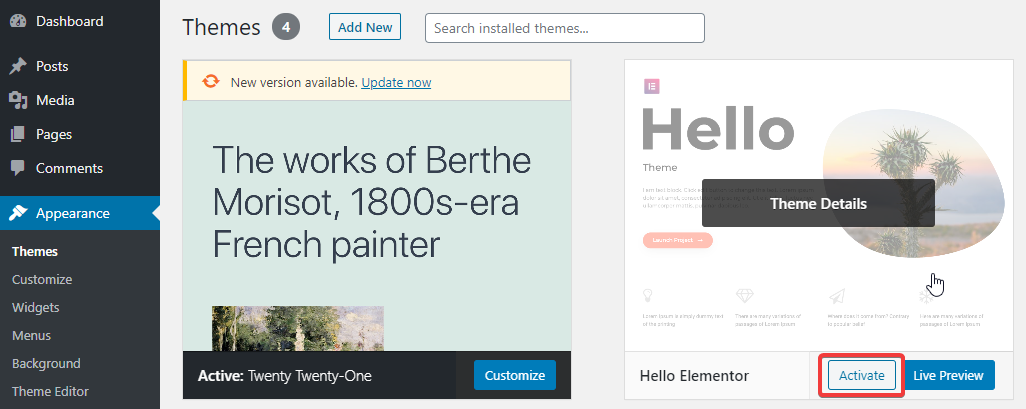
- Back in WordPress, open Appearance > Themes. The newly uploaded theme is in the grid. Hover its card and click Activate.
If you connect with plain FTP because that is all your host offers, change hosts. Plain FTP transmits credentials in the clear, which is unacceptable for a production site in 2026.
How to update WordPress themes
Updates patch security bugs, keep themes compatible with new WordPress and PHP versions, and roll in new block patterns and template parts. Out-of-date themes are a common cause of design breakage after a WordPress core update, so do not skip them.
You have three options:
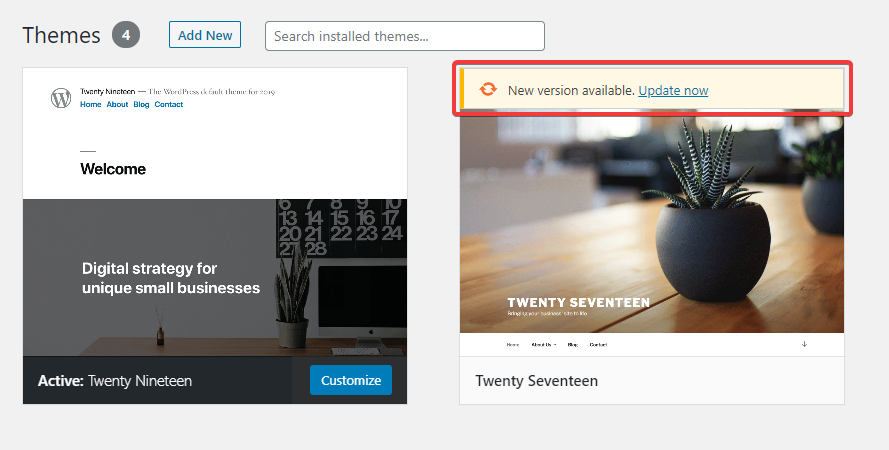
- One-click update. On Appearance > Themes, themes with available updates show a yellow "New version available" notice on the theme card. Click update now inside the notice.
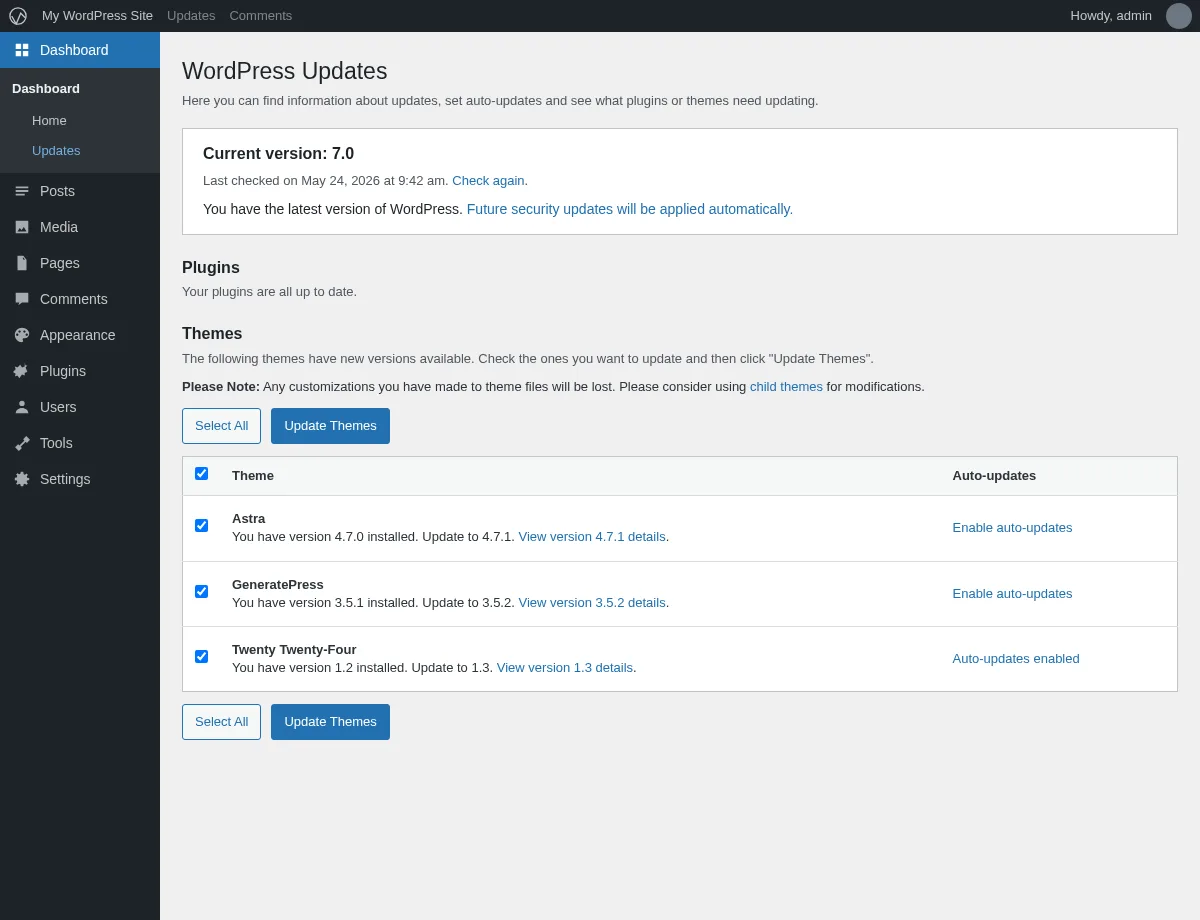
- Bulk update from Dashboard > Updates. Open Dashboard > Updates, scroll to the Themes section, tick the themes you want to update, and click Update Themes. This is the cleanest path when more than one theme is outdated.
- Per-theme auto-updates. Since WordPress 5.5, the Themes screen has an Enable auto-updates link on each theme's Details popup. Click it for any theme you trust to update itself. Good candidates are well-maintained themes from large vendors. Skip auto-updates for heavily customised themes and anything where a bad release would visibly break your homepage.
Before any major theme update, take a fresh backup and (if you have one) update a staging copy first. Customizer settings and Site Editor revisions are usually preserved across a theme update, but a corrupt update package can still wipe a header or footer.
How to switch or delete a WordPress theme
To switch themes, open Appearance > Themes, hover the card of the theme you want, and click Activate. The change is instant. Your old theme stays installed.
To delete a theme:
- The theme you want to delete must not be the active theme. WordPress does not let you delete the theme that is currently live. Activate a different theme first.
- Click the inactive theme's card. The theme details popup opens.
- Click the small Delete link in the bottom-right corner of the popup.
- Confirm the prompt.
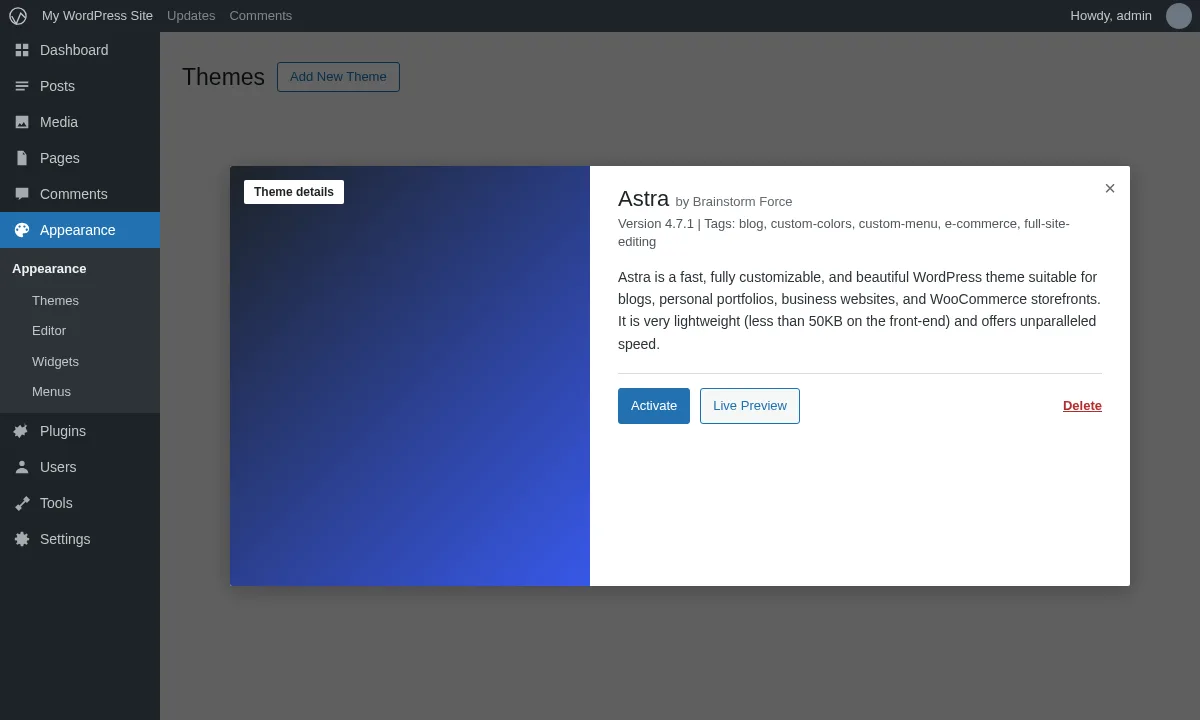
WordPress removes the theme files. Customizer settings and Site Editor templates that were saved against that theme are kept in the database for a while in case you reinstall it, but switching away from a heavily customised theme will reset the live design.
One extra tip: even when you are not using them, keep at least one stock theme installed (Twenty Twenty-Four or Twenty Twenty-Five). If your active theme crashes after a future update, WordPress will fall back to a default theme so the site stays usable while you fix the problem. Without a default present, the fallback fails and you end up in maintenance mode.
Troubleshooting: my site broke right after a theme switch
This happens, especially when switching between a classic theme and a block theme, or when activating a heavy premium theme on a slow host. The usual culprits are a theme that is incompatible with your PHP version, missing required plugins, or a buggy release.
The standard recovery path is:
- Check your inbox. If WordPress detected a fatal error, it sent an email to the admin address with a one-time Recovery Mode login link. Use it to reach a safe admin and switch to a default theme.
- If there is no email, switch themes via SFTP. Connect to your server, open
/wp-content/themes/, and rename the broken theme's folder (for example, append-OFFto the folder name). WordPress falls back to the next available default theme automatically and your site should come back. - If the site still shows "There has been a critical error on this website" after the fallback, work through our full WordPress critical errors walkthrough for the deeper debug flow.
Once the site is up, reinstall the theme on a staging copy and test before re-enabling it in production.
What to do right after the theme is live
A fresh theme install is the start, not the finish. The two highest-value next steps for most beginners are:
- Configure the design. Open Appearance > Editor (block themes) or Appearance > Customize (classic themes) and set your site identity, colours, typography, header, and footer before you publish content.
- Install the right plugins. A theme handles design; plugins add features. See our companion guide on how to install WordPress plugins for the directory, ZIP, and SFTP methods, plus the categories most new sites end up needing first.
Safety habits before you install your next theme
A clean install is the easy part. Choosing what to install is what keeps your site safe.
- Stick to the official directory or known vendors. The WordPress.org listing shows the theme's update frequency, support responsiveness, and active install count. Outside the directory, buy only from established premium theme vendors (Astra, Kadence, Blocksy, GeneratePress, the StudioPress library, big marketplaces like ThemeForest) or the theme author's own site.
- Avoid nulled WordPress themes and plugins. Cracked copies of premium themes are a leading source of malware and SEO spam infections, and they cannot receive security updates.
- Install fewer, not more. Every installed theme adds disk space and a maintenance task. After you settle on the right one, delete the others (except for one stock fallback).
- Take a backup before a theme switch on a live site. Theme switches rarely break a site, but recovering widget assignments and menu locations by hand is painful enough that a one-click restore is worth the minute it takes.
Final word
Installing a WordPress theme in 2026 takes about thirty seconds once you know where the Add New Theme button is. The skill is not the install. It is picking a theme that fits your site goal, keeping it updated, and knowing the two-button recovery move when a switch goes sideways. Stay on the directory or trusted vendors, keep PHP and WordPress current, and you will almost never see a critical error after a theme switch.
FAQ
How do I install a WordPress theme step by step?
In 2026 you have three reliable methods. The easiest is to open Appearance > Themes in your WordPress admin, click Add New Theme, search the directory, click Install on the theme you want, then click Activate. For a premium theme you downloaded as a .zip, click Upload Theme on the same Add Themes screen, choose the file, click Install Now, then Activate. Only fall back to SFTP if both admin methods are blocked by your host.
How do I install a premium WordPress theme?
After you buy the theme, the vendor sends you a .zip file (or a download link). Use Method 2 in this guide: Appearance > Themes > Add New Theme > Upload Theme, pick the .zip, click Install Now, then Activate. If the vendor ships a "package" .zip with extras inside, unzip it first and upload only the inner theme .zip (the one that contains style.css at the top level). Most premium themes then ask you to paste a licence key on a settings page to enable updates.
Can I install a theme on a free WordPress.com site?
No, the WordPress.com free plan does not allow third-party theme installs. You have to upgrade to a paid plan (Personal, Premium, Business, or Commerce) before WordPress.com lets you upload custom themes. If you are on a self-hosted WordPress install (WordPress.org, running on your own host), every install method in this guide works out of the box.
How do I install a WordPress theme on localhost?
Exactly the same way as on a live site. Open https://localhost/wp-admin/ in your browser, go to Appearance > Themes, and use the Add New Theme or Upload Theme flow above. The only difference on localhost is that PHP upload limits are often even smaller than on shared hosting, so the ZIP upload method may fail for large premium themes. If it does, drop the unzipped theme folder straight into your local WordPress install at wp-content/themes/.
How do I delete an installed WordPress theme?
You cannot delete the active theme. Switch to a different theme first under Appearance > Themes, then click the card of the theme you want to remove. In the details popup, click the Delete link in the bottom-right corner and confirm. WordPress removes the theme files. Keep at least one stock theme (for example, Twenty Twenty-Five) installed at all times so WordPress has a safe fallback if your active theme ever crashes.
What is the difference between a block theme and a classic theme?
A block theme uses Full Site Editing: you customise the whole site, including the header, footer, and templates, inside the Site Editor at Appearance > Editor. A classic theme uses the older model: you customise design tokens in Appearance > Customize (the Customizer) and templates are edited in PHP by the theme author. Both kinds install identically. For a new WordPress site in 2026, a block theme is usually the easier long-term choice because you do not need a developer to change a layout.
Is it safe to install nulled or cracked WordPress themes?
No. Nulled themes are a leading source of malware, backdoors, and SEO spam infections on WordPress sites, and they cannot receive legitimate security updates. The few dollars you save by using a cracked premium theme will not cover the cost of cleaning a hacked site. See our full breakdown in nulled WordPress themes and plugins.